


You will receive an email containing the order number and logistics information
US and Europe: 10-15 days
Other Regions: 15-20 days
Expedited can be sent to DHL, 3-7 days to arrive, the freight needs to be paid by yourself. Please contact us if necessary
TRACKING
1.Once the order is shipped, please allow 1-3 business days for the tracking number to be fully updated on the post office system. Please note that your order is actually on the way and there is no delay of the package rather than the tracking number status.
2.If you encounter any problems, please contact me via email.
PRODUCT INFORMATION
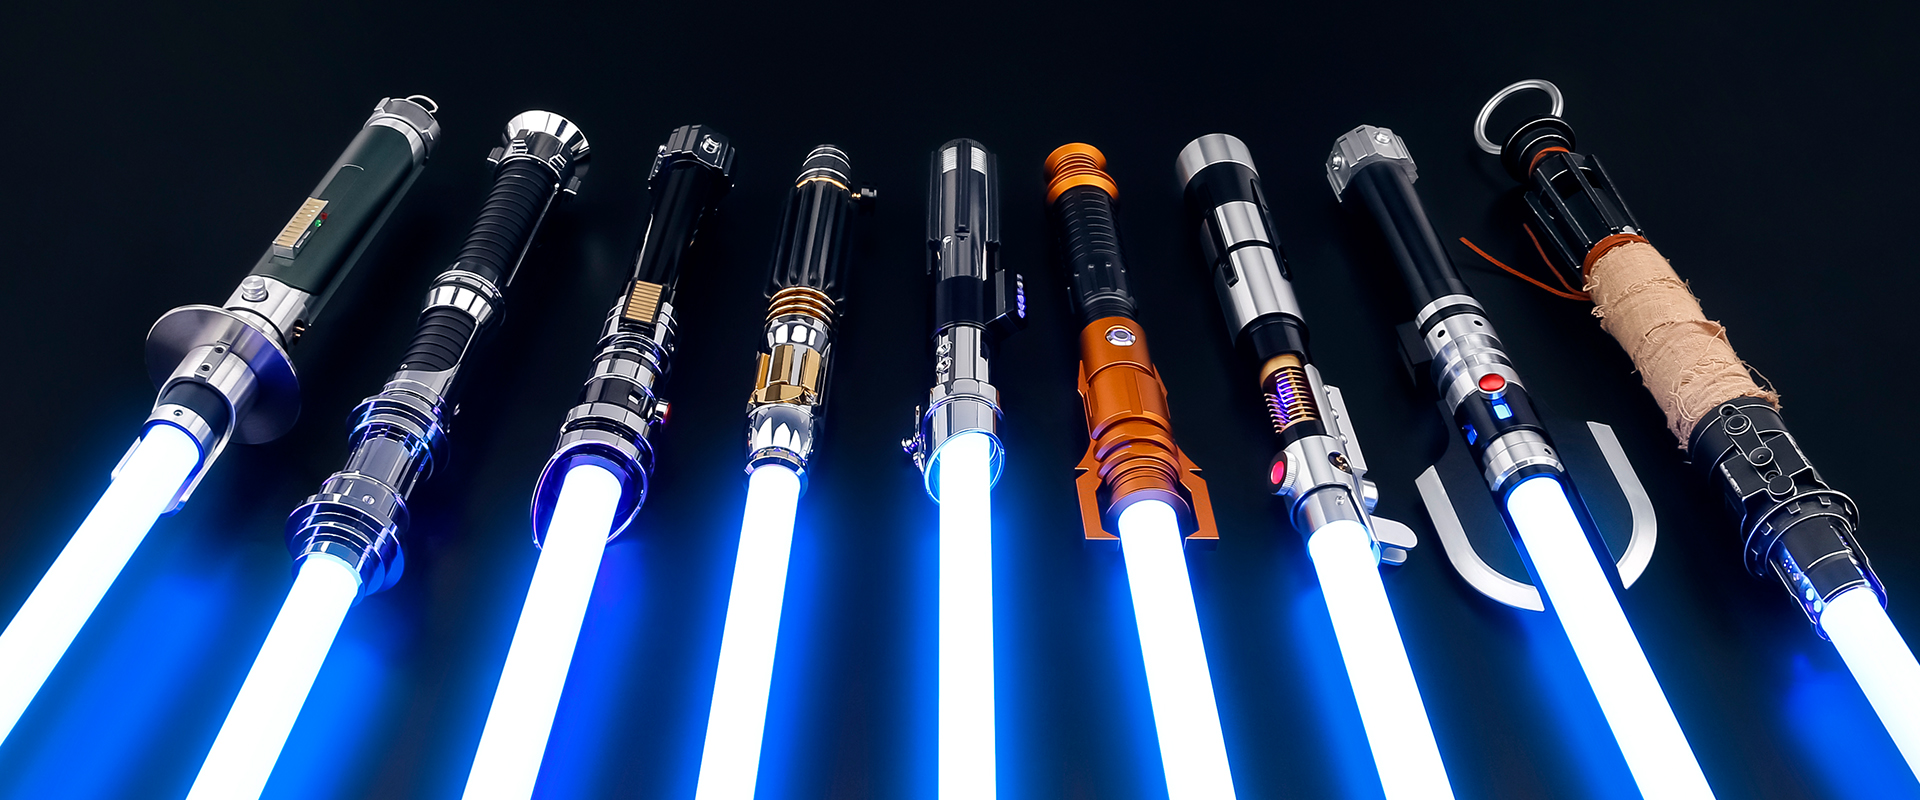
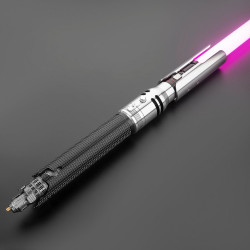
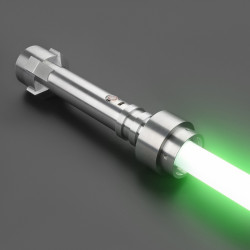
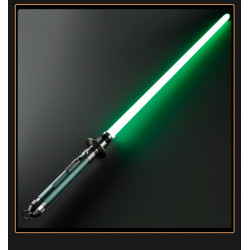
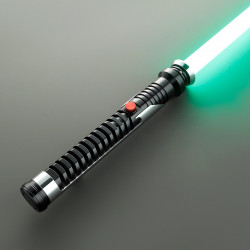
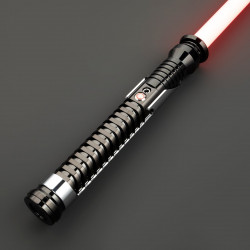
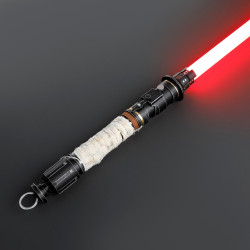
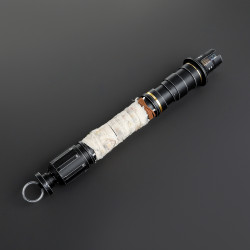
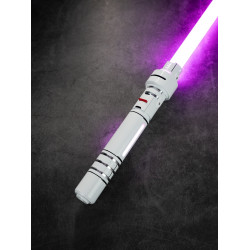
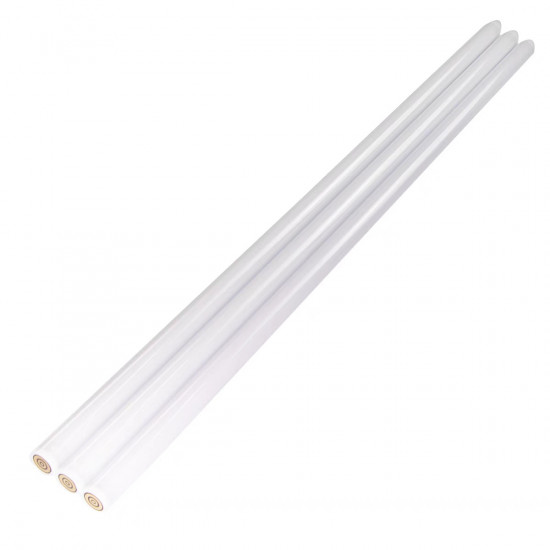
Does your lightsaber need a replacement or an additional blade? We have it in different sizes.
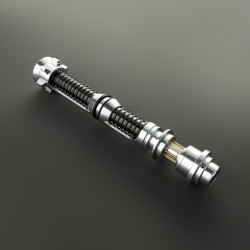
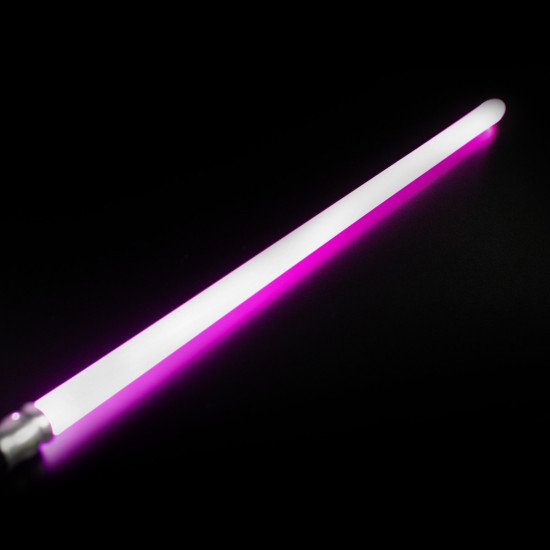
The Neopixel replacement blade is this one. It is, therefore, entirely led and only works with our Deluxe and Premium swords with installed Golden Harvest, Proffie, or Xenopixel boards. This circular connector on the hilt's bottom makes it easier to identify.
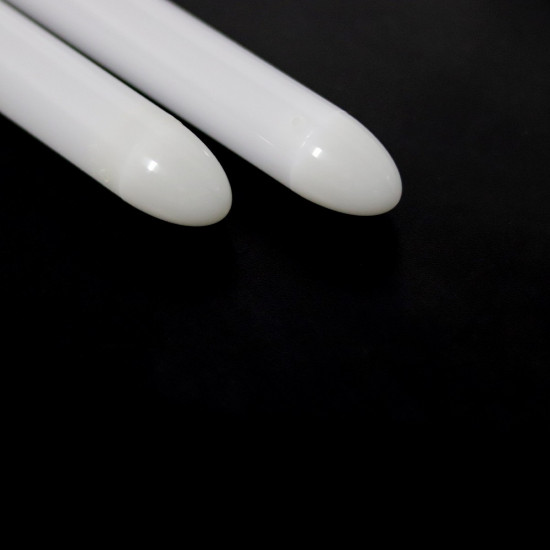
The blade has a bullet-shaped tip. If you would like a round tip, please include a remark to your order or send us an email or chat message.
These are our regular lengths; inquire if you want a smaller size.
Choose between our two sizes :
- 7/8 inch and 2mm thickness: this blade size is rare, and only a few sabers use 7/8 inch, so double-check before choosing this. The polycarbonate is less thick on these blades.
- The most prevalent blade size in our saber lineup is 1 inch and 3 mm thick, and thanks to the added thickness, these blades are mighty.
If you have any questions about our products, feel free to reach out to us through the chat; we speak English and French.
- Stock: In Stock
- Model: blade-neopixel-replacement
Available Options
SABER CONFIGURATIONS
This is a summary of the setups we provide. For further information, see the box above under "Which version to choose?"
- Standard : the basic model, which now has a Xeno 3 board and offers excellent audio, many effects, and customization via an SD card or smartphone app. Baselit sabers, designed for heavy battling, have a lighter blade than standard sabers. It's ideal if you want to participate in stunt/duel accomplishments or cosplay or don't require the Neopixel Blade.
- Premium : It's the choice we desire the most! A Neopixel blade on the same brand-new Xeno 3 board. The blade's high-density LED strip provides an incredible appearance and many visual effects. Currently modifiable via an SD card and, as always, a mobile app.
- Deluxe: For the programmers among you, the Proffie v2.2 board offers fully programmable styles and effects with only one function button. This is the best neopixel lightsaber available. You will adore this if you like getting your hands filthy (mainly with your keyboard) and customizing objects around you!
MAIN FUNCTIONALITIES
All of our sabers provide the following :
- Detachable polycarbonate cutting edge
- You can choose any color for your blade with the complete RGB color picker or fast access presets.
- Control the volume from 0% to 100%.
- Smooth swing: Your lightsaber's humming sound responds precisely to every move you make and is very motion-sensitive.
- Numerous sound fonts and blade styles are pre-loaded, with the option to add and modify your own (Xeno3 sounds and colors, complete control over Proffie).
- Hilts are made of 6063 aluminum and are CE-approved for XENO3 ONLY. They also include free mobile app control and Bluetooth capabilities. Because of the thickness of the hilt, certain sabers have a poor connection; the manufacturing description has further information.
BLADE SPECS
- Baselit sabers are powered by a 12W LED module housed in the handle. Blades are designed for heavy dueling and have a diameter of 1 inch and a thickness of 2 mm.
- Neopixel blades with a full-length, high-density LED strip within are found in Premium and Deluxe sabers. See their description for additional details. Polycarbonate, either 1 inch in diameter and 3 mm thick or 7/8 inch in diameter and 2 mm thick. Although we do not recommend using the 3mm thickness for intensive dueling because of the possibility of damaging the internal LED circuit, it is possible to battle with them. Buying more blades with varying lengths, thicknesses, and widths is possible.
- You may use the tip drag effect and smooth ignitions with the neopixel blades. The neopixel blades included in Premium and Deluxe sabers also significantly improve blaster effects, flash-on-clash, and saber lockups.
BATTERY AND BOARDS
- Rechargeable 3000mAh and 3600mAh batteries can run a saber for one to three hours, depending on whether it's a profile, neopixel, or basalt saber and the effects you're utilizing.
- Never charge a USB device on a computer, console, dongle, hub, or rapid charger—always use a 1A 5V USB charger. Your board will be damaged by improper power outputs and charging devices; the warranty will not cover this.
- Every saber comes with a recharge cable. To charge the Battery, place it either directly on the core (slide the core out or remove the grip part) or behind the pommel piece if the port is visible.
What's in the box ?
✅ The hilt
✅ The blade
✅ Battery
✅ Charging solution (cable or charger)
✅ Tools set
✅ Instructions manual
Xeno3 Baselit Features
For those who want to duel with their lightsabers or are searching for less expensive solutions, Xeno3 Baselit is a fantastic choice. With a variety of colors, effects, motion control, and app support, Xeno3 Baselit is a fully functional core.
Although baselit sabers are not as brilliant as the Xeno3 Neopixe option, they are more suited for spinning or battling, and the replacement blades are less expensive.
We advise selecting a Xeno3 Neopixe or Proffie if you want more realism, stronger light, and sophisticated effects like tip drag.
Check the details below.
12 Blade colors
At the touch of a button, 12 distinct blade colors—Red, Blue, Yellow, Cyan, Ice Blue, Green, Pink, Orange, Purple, Pink-Green, Rose, and White—can be changed.
Xeno Configurator
Control lightsaber features via iPhone or Android app.
34 Preinstalled Soundfonts
Saber sound board has 34 different soundfonts (aka sound profiles) and blade lighting effects that go along.
Whispers of Power, The Teacher, The Second, The Learner, The Dark Lord Revisited, The Champion, Serenity, Idyll, Hatred, Dark Ages, Cyber Terror, Codex of Light, Luke Skywalker, Scavenger Rey, Ray Skywalker, Master Yoda, Ascension Gun, Starlight, Revan, LOR SAN TEKKA, Cal Kestis, Darth Vadar, Darkness, ObiWan Kenobi, Count Dooku, The Emperor, Kylo Ren, Mark Pontillas, Darth Maul, Obiwan Kenobi, The Dark Sword, Scavenger Rey, Kylo Ren, Sailor Moon
Smoothswing
Saber makes realistic lightsaber noises in response to motion. The latest soundboard provides precise and controlled saber movement sounds.
Duel ready
Tough and durable Polycarbonate blade is able to withstand heavy dueling against other sabers.
Flash-on-clash
When two saber blades hit each other or other objects they produce a characteristic lightsaber flash.
Motion ignition
Twist the saber hilt to ignite or retract the saber.
Rechargeable battery
AAA batteries no longer need to be changed frequently thanks to a powerful rechargeable battery and an integrated recharging connector. There is a battery charger available.
Extended battery
While most batteries utilize a 1200mAh battery, this saber contains a more powerful 3000mAh rechargeable battery.
Xeno3 Neopixe Features
If you want the most features and realism, Xeno3 Neopixe is a fantastic option. With their 50W ultra-bright LED strip blades and effects, Xeno3 Neopixe sabers are a unique experience for any enthusiast.
To match the hilt workmanship with the best characteristics and realism of Xeno3 Neopixe, we suggest using Xeno3 Neopixe cores on our master sabers.
Check the details below.
Customization
The Xeno3 Neopixe board offers the full customization of and ability to add new soundfonts, blade lighting effects, blade colors, motion effects, and much more.
SD Card
16 GB SD card to enable customization.
Xeno Configurator
Control lightsaber features via iPhone or Android app.
34 Preinstalled Soundfonts
Saber sound board has 34 different soundfonts (aka sound profiles) and blade lighting effects that go along.
Included Soundfonts:
Whispers of Power, The Teacher, The Second, The Learner, The Dark Lord Revisited, The Champion, Serenity, Idyll, Hatred, Dark Ages, Cyber Terror, Codex of Light, Luke Skywalker, Scavenger Rey, Ray Skywalker, Master Yoda, Ascension Gun, Starlight, Revan, LOR SAN TEKKA, Cal Kestis, Darth Vadar, Darkness, ObiWan Kenobi, Count Dooku, The Emperor, Kylo Ren, Mark Pontillas, Darth Maul, Obiwan Kenobi, The Dark Sword, Scavenger Rey, Kylo Ren, Sailor Moon
Infinite Colors
Supports any color on the RGB spectrum. Color settings can be controlled via an app.

Blade lighting effects
Color Change, Blaster Deflection, Saber Lock-up effect, Flash-On-Clash, Stab, Rainbow, Blade Spin, neutral light, stable and unstable colors, Motion activated Saber Ignition.
Sound Effects
Along with blaster deflection, saber lock-up, stab effect, tip melt effect, and other features, the Neopixel board comes with pre-installed sound effects.
Smoothswing
In reaction to motion, Saber emits lifelike lightsaber sounds. The most recent soundboard produces regulated and accurate sounds of saber movement.
Flash-on-clash
When two saber blades hit each other or other objects they produce a characteristic lightsaber flash.
Rechargeable battery
A strong rechargeable battery and an integrated recharge connector eliminate the need for frequent AAA battery replacements. A battery charger is included.
Extended battery
While most sabers utilize a 2000mAh battery, this saber contains a more powerful 3600mAh rechargeable battery.
Advanced audio
Powered by High-Quality Speakers with a 2/3 Watt & 4/8 ohm system
Blade
Made our of durable polycarbonate. Inside an Extremely Bright 50-Watt pixel LED Strip.
Protection systems
Battery overcharge protection, system overload protection, battery installing protection.
Proffie 2.2 Features
For those seeking the maximum level of realism and features, Proffie is an excellent option. The core with the greatest degree of customization is this one. Nevertheless, it necessitates proficient user skills, and we suggest Xeno3 Neopixe for the majority of clients who are not seeking to upgrade their typefaces. The 50W super bright LED strip blades and effects on both the Proffie and Xeno3 Neopixesabers make using them an unforgettable experience for any fan.
We recommend Proffie or Xeno3 Neopixecores on our master sabers to match the hilt craftsmanship with the best features and realism.
Check the details below.
Customization
The Proffie 2.2 board offers the full customization of and ability to add new soundfonts, blade lighting effects, blade colors, motion effects (advanced users only), and much more.
12 Pre-Installed Blade colors
12 different blade colors changeable at the press of a button (Red, Green, Blue, Purple, Orange, Yellow, Pink and their shades in between). You can install as many custom colors as you like.
22 Pre-installed Soundfonts6
22 distinct soundfonts and blade lighting effects, including saber lock-up, saber collision and ignition, blaster deflection, motion noises, movie character quotations, and well-known music, are available on the Saber sound board. Blade lighting effects and your own soundfonts are optional.
Blade lighting effects
Color Change, Blaster Deflection, Saber Lock-up effect, Flash-On-Clash, Stab, Tip Melt, Rainbow, Blade Spin, neutral light, stable and unstable colors.
Sound Effects
The Neopixel board offers pre-installed sound effects that go along with blaster deflection, saber lock-up, stab effect, tip melt effect, and more.
Smoothswing
Saber makes realistic lightsaber noises in response to motion. The latest soundboard provides precise and controlled saber movement sounds.
Flash-on-clash
When two saber blades hit each other or other objects they produce a characteristic lightsaber flash.
Rechargeable Battery
The necessity to regularly replace AAA batteries is eliminated by a strong rechargeable battery with an integrated recharging connector. There is a battery charger included.
Extended Battery
While most sabers utilize a 1200mAh battery, this saber contains a more powerful 3600mAh rechargeable battery.
Advanced Audio
Powered by High-Quality Speakers with a 2/3 Watt & 4/8 ohm system
Blade
Made our of durable polycarbonate. Inside an Extremely Bright 50-Watt NeoPixel LED Strip.
Motion Effects
For advanced users only. Motion effects can be set up through a guide on the Proffie Forum.
How to Make a Neopixel Blade?
Building your NeoPixel blade is a far more enlightening experience than purchasing one.
Additionally, after completing the process, you will realize that you might have unintentionally opened a multipurpose gate.
Any of your favorite Star Wars characters can be readily recreated as a personalized NeoPixel blade the next time!
Particularly the ones you can't find in a retail store or online.
Why don't you do the unthinkable instead of waiting for the NeoPixel blades to arrive?
Consider creating a blade that is both affordable and up to your standards. It sounds like a dream, doesn't it? You're now wondering, though, if the procedure had been that simple.
Don't be concerned about that. I've documented my experience to help you build a NeoPixel blade like a pro.
Step 1: Get the Neopixel Strips
Neopixel blade gets its name from the unique "Neopixel LEDs" that are included inside it.
Neopixel LEDs are sophisticated and reasonably priced, but they are also simpler to manage because each one may be treated separately.
The LEDs are inserted as strips for a lightsaber blade. A high-density 144 LED thin NeoPixel strip, about 1 meter (32 in.) long, is typically utilized. Thus, when the blade is lit, the LEDs in the strip create a smooth and continuous blade effect.
When grouped together, the LEDs can be controlled in various ways. For instance, you may replicate the striking effect, swinging, ignition mode, blade mode, ON/OFF effect, and more.
There are just enough details. Let's grab those renowned NeoPixel strips I've been raving about!
But first, be sure to get RGB LEDs that are WS2182 rather than RGBW. It is a typical error made by a lot of lightsaber novices.
Additionally, when making a purchase, you will discover that there are primarily two types of NeoPixel LED strips. One costly option is to purchase a single long LED strip. An alternative is to use two 50cm LED strips with a small space between them. I advise you to remember the length of your blade. Typically, a 70–90 cm blade is employed, necessitating a 24 or 32-inch strip. Both kinds are adaptable to the specified dimensions.
Which one you purchase will depend on your budget. But don't worry—you can adjust the 50cm strips to close the gap by tucking, nipping, and reattaching. Fortunately for us, this strip already has control and brightness comparable to the pricey Neopixel strip.
Whatever you decide, don't sacrifice the NeoPixel strips' quality.
Step 2: Decide the Grade of the Polycarbonate Tube
Given the wide range of options available, I advise you to go with polycarbonate. No one has yet to surpass polycarbonate tubing, despite my testing of a variety of materials, including PVC, acrylic, and other less expensive plastics.
The original polycarbonate is tinted blue. It is primarily a thermostable, robust 25.4 mm luminous material with countless benefits for lightsaber blades.
Another fantastic feature is the ability to select a polycarbonate blade according to durability. Glass is also available in various grades, ranging from mid-grade to high-grade.
You must use it prudently if you are trying to reduce the expense. The cost of Glass rises in tandem with its quality. The most substantial and most suitable material for dueling is high-density polycarbonate. If you want to engage in dueling, I suggest a sturdy blade with an exterior diameter of 25 mm and an interior diameter of 22 mm. You can, however, stretch it to 31mm/1.25 OD if you'd like.
Mid-grade, on the other hand, is ideal for hobbies like collecting, spinning, and displaying.
Future developments include precut polycarbonate tubes with a light diffuser and resin coating in a variety of lengths. You should not be concerned if you cannot obtain the coated ones. A light diffuser sheet available on Amazon can be used to DIY a precise polycarbonate blade.
You just have to cut the sheet to the blade's length and roll it inside the tube.
Step 3: Use Skinny Pixels Alternative
As we are gathering all of the supplies. The strips' dimensions must be measured in advance because they will be modified inside the blade. You don't want the NeoPixel LEDs to be destroyed before use and the blade to be overloaded.
Since we employ two strips on either side of the blade, a diffusing sheet may still easily accommodate the 1mm standard NeoPixel LED.
You do have another sophisticated choice, though.
As previously stated, clever skinny pixel strips can be used to save costs in place of a single-color RGB strip. They may flex easily in the blade and take up less room. You also don't have to tinker with wires anymore. They also have longer-lasting batteries. Finally, their uniform light diffusion reduces a lot of needless work by evenly illuminating the blade.
Step 4: Modify the Neopixel Strips
A few changes must be made before the NeoPixel strip is attached to the blade. The blade does not come with a pre-made NeoPixel strip ready to be inserted. Even though they are available, they constantly appear to be sold out. Thus, we shall make the necessary adjustments ourselves.
Use Coroplast
Neopixel strips are frequently made more robust by using coroplast, a corrugated plastic sheet. These strips of translucent plastic are available in various diameters. That is, of course, to align your NeoPixel strip with the coroplast's dimensions.
Typically, a 20 × 30 inch sheet measuring 4 mm by 4 mm is available for purchase. After that, the coroplast can be trimmed to fit the NeoPixel strip. In order for the NeoPixel strip to function, the coroplast serves as its backbone. It is fastened to the rear of the strips to make them more robust and facilitate NeoPixel strip insertion. In this manner, you may avoid the NeoPixel strip becoming distorted and making you even more frustrated.
Extra Protective Layers
Additionally, the soldered wires and weatherproof sheet are included in the packing for the NeoPixel strip. The other layers protect the one-pixel strip. The additional layers, however, only cause difficulty when the strip is being inserted into the blade. With the use of a box-cutting knife, the layers can be eliminated.
Forget about the NeoPixel's strip if you are concerned about its safety. The strips are already made to withstand heat and water. In addition, the polycarbonate tube will provide adequate security.
Soldering Wires
Last but not least, if the wires are already made to connect to the 5V board pins, they are directly related to NeoPixel strips. Otherwise, you would have to glue the wires to the pins individually. Three wires are connected to one end of a NeoPixel strip—not four, not two, not three. You must solder the wires using a soldering iron if they are not already connected to the pins. To further protect the region, apply a high-quality adhesive.
Replace the wires carefully with the board's pins. On the left is 5V (red), on the right is Ground (black), and in the center is Data-In (white).
Step 5: Test Neopixel Strip outside Blade
The best course of action is to test everything outside the blade first.
Put a Lipoid battery into the circuit and attach the pins to the board. Additionally, a button switch can be included. Turn the Ad fruit Neopixel strip on, check that all of the LEDs are lit up, and make sure the connections are tight.
Step 6: Prepare the Neopixel Strip
Let's ensure the NeoPixel strip functions flawlessly now. Using tape and the previously purchased coroplast, we can patch it before attaching it to the blade.
Transparent tape, double-sided tape, and coroplast are currently required. After cutting the NeoPixel strip, attach the coroplast strip to one side. Use double-sided tape to help connect the strip to the side of the polycarbonate blade, which will help with adhesion on one side. Another layer of coroplast should be attached to the other side of the NeoPixel strip. Apply clear tape to this strip. On top, the second coroplast layer serves as a diffusion layer for even illumination and offers stability.
At this point, the NeoPixel strip has coroplast layers on both sides. Use more clear tape to secure the layers. Don't apply transparent tape in a single, fluid motion. Slice off little strips of tape, then wrap them around the strip, leaving gaps between them.
Switch the strip on and take another look at the circuit. By moving it around a little, verify that the connection is strong and that the wrapped NeoPixel strip won't come loose from the blade.
Step 7: Insert the Neopixel LEDs in Blade
After the NeoPixel assembly is ready, carefully place it within the polycarbonate tube. In order to connect the wire to the hilt later, keep the end facing out!
Bring the NeoPixel strip to life. The light must be bright and consistent for the blade to be illuminated. Adding a polycarbonate layer could have a dimming effect, but it should be hardly perceptible.
Step 8: Seal the Deal
To prevent them from falling out, we must fasten the NeoPixel strip to the blade. We can attach the strip to the blade using hot glue, transparent tape, or a thin coating of silicone.
Now, insert the blade into the emitter's opening. The polycarbonate blade and hilt will be connected with the aid of the emitter. If necessary, use a small amount of force to secure the blade.
The circuit should dangle from the other side of the blade, which should be fastened to the emitter. Later, the pins and circuit will be fitted into the hilt. Find out more about the lightsaber's overall construction here.
Switch on the circuit and admire your work with pride. You can check your pleasing job by waving around the blade.
Tip!
The use of two 1mm individual blades on either side of the blade dissipates heat more effectively than the thin NeoPixel blades. You must use caution. The energy supplied to the NeoPixel blades also affects heat dissipation. It easily melts the blade. The concept is that in order to preserve both our hands and the blades, the heat dissipation must be kept below 40%. Therefore, make sure to check the Lipoid battery's output first.
Ultimately, I must admit that this was just the start. After completing the procedure, you can construct several blades using various NeoPixel LED strips with variable lengths and densities. Experiment and see what other possibilities and modifications you can think of.
Please get in touch with us again to share your experience!
Frequently Asked Questions (FAQs)
How do you make a Neopixel lightsaber?
In contrast, the NeoPixel lightsaber is primarily composed of a hilt and a NeoPixel blade. The building involves many different factors, but in the middle of it, all are NeoPixel LEDs. Visit this link to learn more about the construction.
What is inside a Neopixel blade?
In conclusion, the NeoPixel blade consists of the NeoPixel strip, sticky foaming sheet, tape, diffusion layer, and more. The blade is illuminated by Ad fruit NeoPixel LEDs, which are the primary component that cannot be ignored.
How many pixels are in a NeoPixel blade?
The length of the NeoPixel blade can affect the pixels. Nonetheless, a tiny NeoPixel strip from Ad fruit (1 meter, 144 pixels) is typically attached to a thick 1-inch OD polycarbonate tube.
Can you fight with a NeoPixel blade?
The NeoPixel blade's longevity will depend on its construction and quality. Polycarbonate has various glass grades. Superior-quality material outlasts its rivals and is best suited for battling.
Do Neopixel lightsaber blades break?
Neopixel blades have a limited amount of pressure tolerance before breaking. You run the risk of quickly damaging the pricey NeoPixel lightsaber blades when engaging in heavy and furious battling.
Are NeoPixel blades heavy?
The maximum weight of a heavy-grade NeoPixel blade is 190g for 7/8" and 300g for 1". Twelve inches is equivalent to about 30 cm. Despite their excellent durability, not all blades are appropriate for fighting.
Are NeoPixel blades removable?
Neopixel blades are simple to remove and replace. Previous NeoPixel blades can be replaced with various types. With the advancement of NeoPixel technology, NeoPixel blades for in-hilt LED sources are now available.
