

You will receive an email containing the order number and logistics information
US and Europe: 10-15 days
Other Regions: 15-20 days
Expedited can be sent to DHL, 3-7 days to arrive, the freight needs to be paid by yourself. Please contact us if necessary
TRACKING
1.Once the order is shipped, please allow 1-3 business days for the tracking number to be fully updated on the post office system. Please note that your order is actually on the way and there is no delay of the package rather than the tracking number status.
2.If you encounter any problems, please contact me via email.
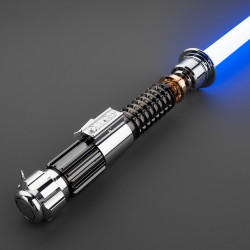
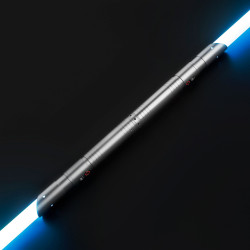
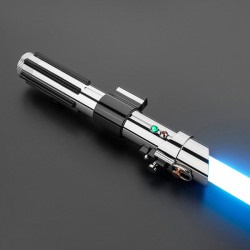
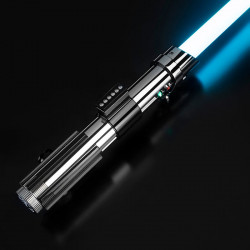
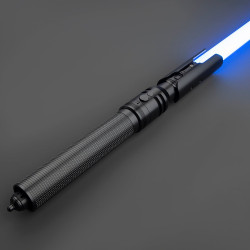
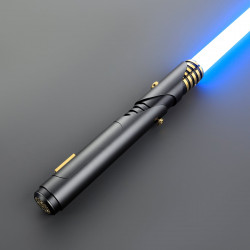
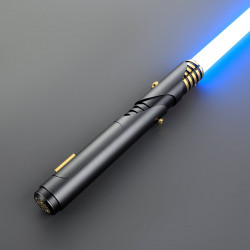
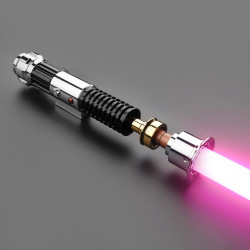
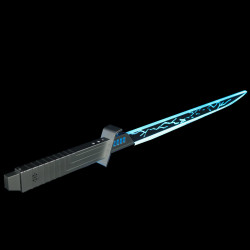
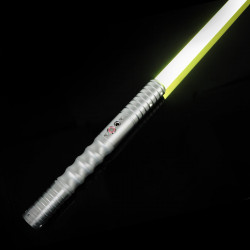
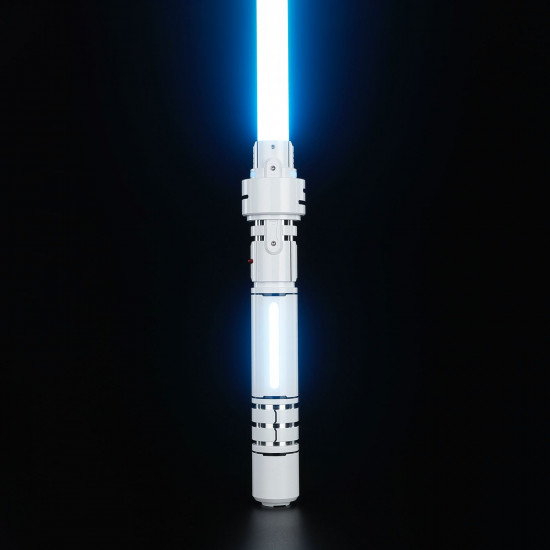
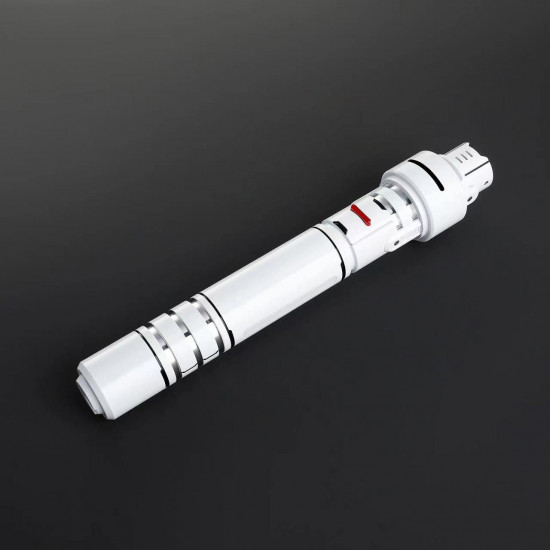
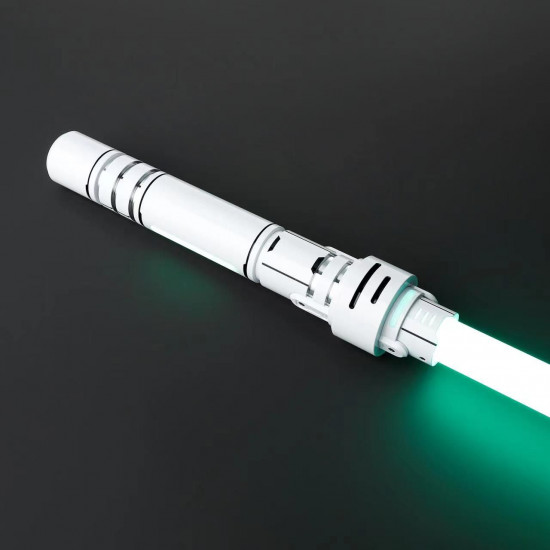
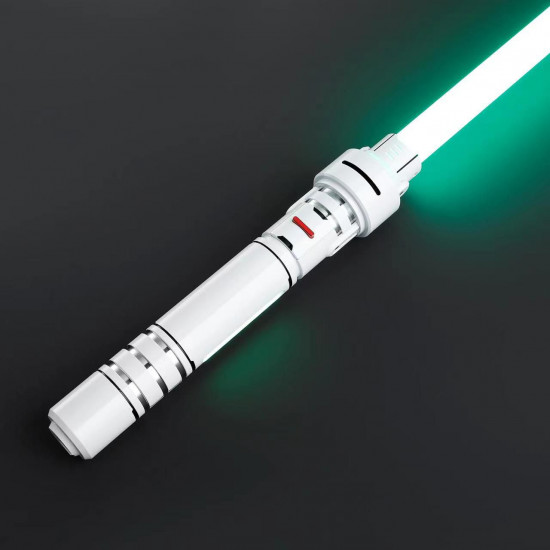
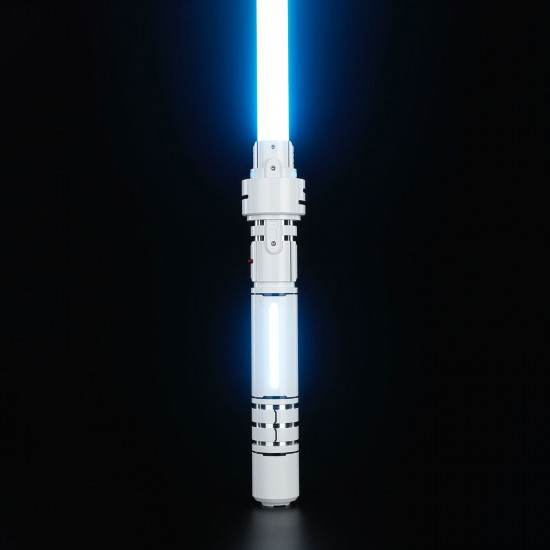
Inspired by the beam saber from the Japanese science fiction franchise Gundam
Only charge with a 5v 1 amp max charger
Proffie and Xenopixel version has LEDs in the grip that mirror the blade. Baselit version does not have a lit grip
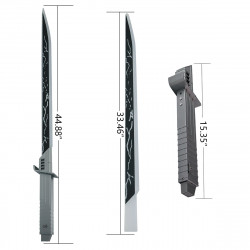
Default blade length 36"
Other blade options are 32" and 28"
Blade Diameter 1"
USB - C charging
Includes charger, screws and hex key
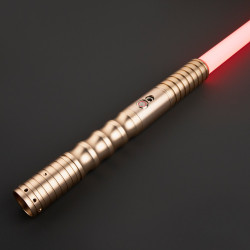
Take Control of Your Inner Strength with the Gundam Beam Lightsaber!
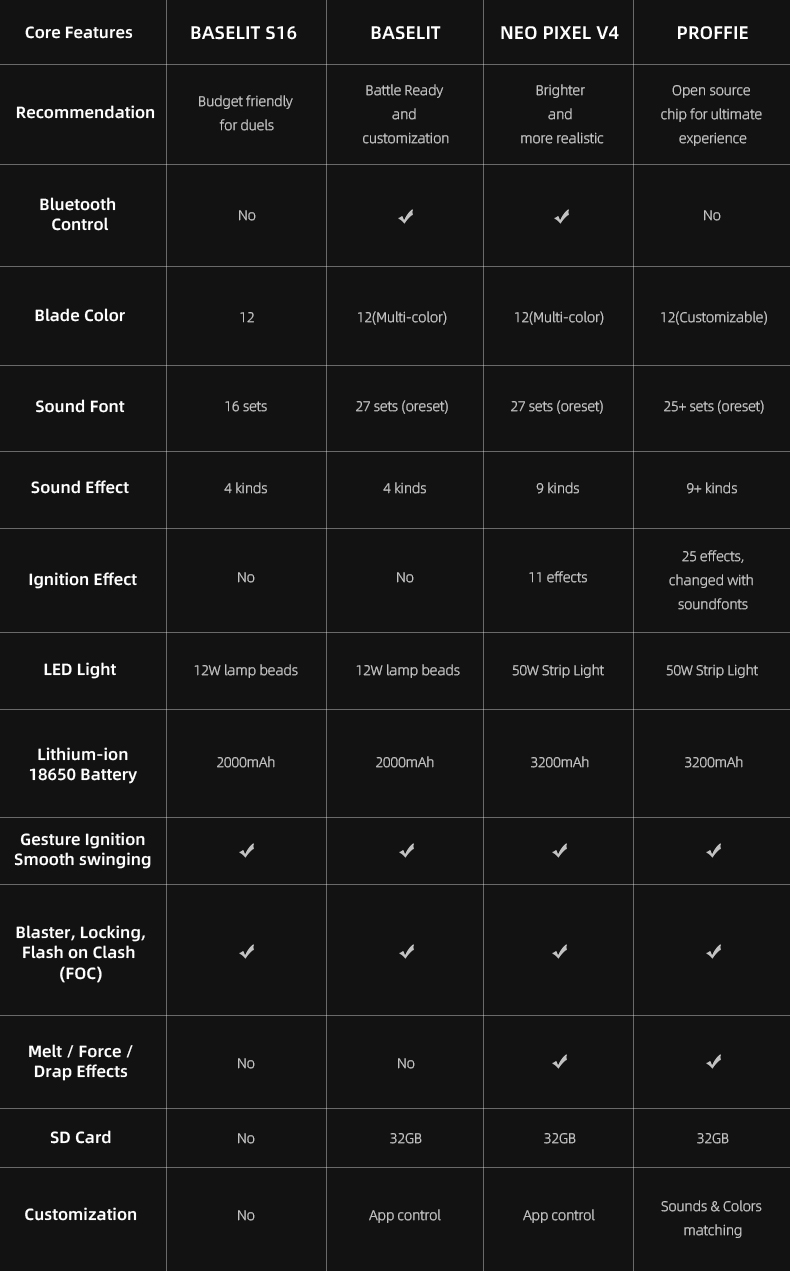
Compared to others, this masterpiece is more reasonably priced and has all the functionality you could possibly need. Neopixel and baselit lightsabers are the options available to you. An excellent option for novices or those wishing to expand their collection with a new custom fx lightsaber at a reasonable cost!
We provide our sabers with a PC (Baselit V3) or Neopixel (Xeno3 Neopixel) blade.
We designed our Baselit V3 Sabers to be used in Heavy Duelling.We designed our Xenopixel V3 Sabers for Easy to Medium Levels of Duelling.
Harness Your Power Within with the Gundam Beam Lightsaber!
- Stock: In Stock
- Model: combat-saber-model-gundam-beam
- SKU: combat-saber-model-gundam-beam
- UPC: combat-saber
- ISBN: combat-saber-mode
- MPN: combat-saber-model-gundam-beam
Available Options
- Lightsaber Guide
- Lightsaber Operation Manual
- Core difference
- All 7 Lightsaber Combat Forms Explained
Lightsaber Guide Rev.1.1
How to Choose a Lightsaber
The lightsaber's core, not the model, controls the igniting effect, sound font, color change, smooth swinging, and Bluetooth control. While lightsaber models may differ in their underlying structures, all of the lightsaber's features will remain the same as long as the core version remains the same. Every version at LaserPointerWorld has a pixel core.
Choose your preferred lightsaber model based on the hilt details.
Based on the hilt design specifics (such as character names, pattern information, and structural elements), choose the lightsaber model that best suits your needs.
Further customize the lightsaber's attributes based on your personal preferences.
A variety of hilt colors, traditional or weathered styles, 32- or 36-inch blade lengths, and straight or curved blades are available.
Select the lightsaber core that meets your functional requirements.
The core is the control center for all of the lightsaber's functions, determining the effects it can produce.
How to Use a Lightsaber
- Basic Usage
Finding the lightsaber core is the first step towards using one. You can check out LaserPointerWorld's tutorial manuals or the instructions that came with the package.
- App Control
You might also need to learn how to set up a Bluetooth connection and use an app to control lightsabers with S-RGB or SNV4 cores.

Customization
For lightsabers with SNV4 or Proffie cores, you may need to download configuration files. We provide a selection of configuration files for you to download.
- Recommended Tutorials
You can view videos tutorials from certain Jedi masters in addition to the official LaserPointerWorld tutorials. The following YouTube channel is suggested by us:
YouTube: @thefrugaljedi
After-Sales and Modifications
Since the core contains electronic chips, circuit or software issues may occur during installation. You can contact us for troubleshooting solutions.
Baselit RGB Lightsaber Operation Manual V1.1
Make sure your lightsaber has a single button or twin buttons before reading this guide.
It should be noted that lightsabers often have three states: active, standby, and off.
When your saber is in standby mode, the blade is not in use but it is still on and accepting inputs.
When your saber blade is in active mode, the LED is lighted and, if enabled, producing sound.
One button operation
1.1 While blade is in standby mode
1.1.1 Wake up
To go into standby mode, press and hold the button until the light turns on.
1.1.2 Power On
Tap the button.
1.1.3 Adjust volume (3 modes)
Once the breath indicator lights once, press and hold, then let go.
1.1.4 Change sound fonts
Once the breath light blinks twice, release the pressure that you applied.
1.1.5 Change BGM (3 types)
Release the hold after the breath light blinks three times.
1.1.6 FOC off/on
Hold and release when the breath light blinks four times.
1.1.7 Motion Control On/Off
Hold and release when the breath light blinks five times.
1.1.8 Power save mode
Hold down the button until the backlight turns off (it won't work for ten minutes).
1.2 While blade is active
1.2.1 Blaster
Tap the button.
1.2.2 Lock
After the breath light flashes once, hold down the button and let go.
1.2.3 Color Change
Hold until the breath light blinks twice, then release. Tap the button to exit this mode.
1.2.4 Change Blade Effects
Press and hold the button for three blinks of the breath light, then let go.
1.2.5 Turn Off
After the breath light flashes four times, hold down the button and let go.
1.3 Gesture operation in standby mode
1.3.1 Turn on
Twist the saber.
1.3.2 Change sound fonts
Holding the button with the blade up, twist the saber.
1.3.3 Change BGM
Holding the button pressed, rotate the saber while keeping the blade down.
1.4 Gesture operation in active mode
1.4.1 Turn off
Twist the saber.
1.4.2 Switch Blade Effects
Holding the button, twist the saber when the blade is up.
1.4.3 Change Color
Holding the button pressed, rotate the saber while keeping the blade down.
1.4.4 FOC
Strike the saber.
Two-button operation
PWR Button: Main Button, Power Button.
AUX Button: Auxiliary Button, Function Button.
(When the buttons are distributed up and down: Upper button is the main button, lower button is the AUX button; When the buttons are distributed left and right: Left button is the main button, right button is the AUX button)
2.1 While blade is in standby mode
When the batteries are inserted correctly, it beeps.
When charged properly, it beeps.
2.1.1 Power On
Tap the PWR button.
2.1.2 To change soundfonts
Tap the AUX button.
2.1.3 Adjust volume
Press and hold the PWR button, then release (mute/low volume/high volume).
2.1.4 Power save mode
Twenty minutes without operations.
2.2 While blade is active
2.2.1 Power off
Tap the PWR button.
2.2.2 Blaster
Tap the AUX button.
2.2.3 Lock
Hold down the AUX button for a moment, then let go.
2.2.4 FOC Off/On
Press and let go of the PWR button.
2.3 Gesture operation in standby mode
2.3.1 Power on
Rotate the saber.
2.3.2 Change sound fonts
Holding the AUX button while the blade is up, twist the saber.
2.3.3 Change BGM
Holding press the AUX button, twist the sword with the blade down.
2.4 Gesture operation in active mode
2.4.1 Turn off
Twist the saber.
2.4.2 Switch Blade Effects
Holding the AUX button while the blade is up, twist the saber.
2.4.3 Change Color
Holding press the AUX button, twist the sword with the blade down.
2.4.4 FOC
Hit the saber.
Note: For further information on how to use the lightsaber safely and in detail, please consult the user handbook that comes with it.
SNV4 Saber Operation Manual Rev.1.3
Make sure your lightsaber has a single button or twin buttons before reading this guide. It should be noted that lightsabers often have three states: active, standby, and off.
When your saber is in standby mode, the blade is not in use but it is still on and accepting inputs.
When your saber blade is in active mode, the LED is lighted and, if enabled, producing sound.
SNV4 Pro Lightsaber Operation Manual
One Button Operations
Charging: The power level alert will ring when you insert the charging wire. It will turn on the breathing light.
1.1 When the blade is in the power-off state
1.1.1 Switch between 82 and 92 blade types
Press the button three times in quick succession.
1.1.2 Wake up the blade
Long press the button.
1.2 While blade is in standby mode
1.2.1 Enter power-on mode
After the button has entered standby mode, briefly press it.
1.2.2 Enter power-off mode
① Press and hold the button until the blinking breathing light stops.
② Automatic shut-off after ten minutes if nothing is done.
1.2.3 Switch the volume
Once the breathing light blinks once, press and hold the button for a moment, then let go.
1.2.4 Switch power-on effects
Once the breathing light blinks twice, press and hold the button for a moment before releasing it.
1.2.5 Switch regular lighting effects
Once the breathing light blinks three times, press and hold the button for a moment before releasing it.
1.2.6 Switch sound effects
Once the breathing light blinks four times, press and hold the button for a moment before releasing it.
1.3 While blade is active
1.3.1 Enter standby mode
To put the device in standby mode, press and hold the button until the breathing light blinks four times.
1.3.2 Enter power-off mode
Hold down the button until the blinking breathing light stops.
1.3.3 Shockwave
Quickly tap the button.
1.3.4 LOCK-UP
Once the breathing light blinks once, press and hold the button for a moment, then let go.
1.3.5 Switch colors
Once the breathing light blinks twice, press and hold the button for a moment before releasing it.
1.3.6 Toggle FOC on/off
Once the breathing light blinks three times, press and hold the button for a moment before releasing it.
1.4 Gesture operations in standby mode
1.4.1 Reverse to switch sound effects
Tilt the blade upward, hold the button, and rotate.
1.4.2 Enable or disable BGM
Tilt the blade downward, hold the button, and rotate.
1.5 Gesture operations in active mode
1.5.1 Force
Hold the button, tilt the blade upwards, and then rotate.
1.5.2 Switch colors
Hold the button, tilt the blade downwards, and then rotate.
1.5.3 Drag
Tap the blade while holding down the button.
1.5.4 Melt
Press and hold the button while pushing forward horizontally.
1.5.5 Stab
Release the button and thrust forwards.
Two Button Operations
PWR button: Main button, power button.
AUX button: Auxiliary button, function button.
(When buttons are arranged vertically: upper button is the main button, lower button is the AUX button; when buttons are arranged horizontally: left button is the main button, right button is the AUX button)
Charging: Insert the charging cable, and the charging sound effect will play while the breathing light blinks.
2.1 When the blade is in the power-off state
2.1.1 Switch between 82/92 blade types
Press the main button three times quickly.
2.1.2 Enter standby mode
To switch to standby mode and hear the power-on sound effect, long press the main button.
2.2 While blade is in standby mode
2.2.1 Enter power-on mode
Press and hold the main button briefly to activate the device.
2.2.2 Enter power-off mode
To hear the power-off sound effect and switch to power-off mode, quickly press the AUX button three times.
2.2.3 Switch sound effects
Short press the AUX button once and then release.
2.2.4 Switch power-on startup effects
To hear the sound that corresponds with a successful switch, long press the main button.
2.2.5 Switch power-on default lighting effects
To hear the sound that corresponds with a successful switch, long press the AUX button.
2.2.6 Adjust volume
To access the volume setting mode, simultaneously press and hold the main and AUX buttons. push the main button briefly to raise the volume, then push the AUX button briefly to lower it. To hear the sound that indicates you are leaving the volume setting mode, press both buttons at the same time once again.
2.3 While blade is active
2.3.1 Enter power-off mode
Press the main button briefly to switch to power-off mode.
2.3.2 Shockwave
Short press the AUX button.
2.3.3 LOCKUP
To switch to LOCKUP mode, hold down the AUX button for a full second before releasing it. To get out of LOCKUP mode, briefly push the AUX button one more.
2.3.4 Toggle FOC on/off
To turn on or off FOC mode, press the main and AUX buttons simultaneously when the device is in power-on mode.
2.4 Gesture operations in standby mode
2.4.1 Reverse to switch sound effects
Tilt the blade upward, hold down the main button, and rotate.
2.4.2 Enable or disable BGM
Tilt the blade downward while holding down the main button, then spin.
2.5 Gesture control in active mode
2.5.1 Force
Hold the main button, tilt the blade upwards, and then rotate.
2.5.2 Switch colors
Hold the main button, tilt the blade downwards, and then rotate.
2.5.3 Drag
Hold the main button and tap the blade.
2.5.4 Melt
Hold the main button and thrust forwards horizontally.
2.5.5 Stab
Press the primary button and propel yourself forward.
SNV4 Lightsaber Operation Manual
One button operation
1.1 While blade is in standby mode
1.1.1 Enter standby mode
Hold down the button until the light comes on.
1.1.2 Adjust volume
Once the breath light flashes once, press and hold, then let go.
1.1.3 Toggle boot effect
Once the ventilation light blinks twice, press and hold the button for a moment, then let go.
1.1.4 Change blade effect
Press and hold until the breath light blinks three times, then release.
1.1.5 Change sound fonts
Press and hold until the inflation light blinks four times, then release.
1.1.6 Power save mode
automatically switches to power-saving mode after ten minutes of inactivity.
1.1.7 Enter boot status
Press the button to put the device in standby mode.
1.2 While blade is active
1.2.1 Blaster
Quick click on the button.
1.2.2 Lock
Once the breath light flashes once, press and hold, then let go.
1.2.3 Change Blade Color
Once the breath light blinks twice, release the pressure that you applied.
1.2.4 FOC on/off
Once the inflation light blinks three times, release the pressure that was applied.
1.2.5 Off
Press and hold until the inflation light blinks four times, then release.
1.3 Gesture operation in standby mode
1.3.1 Change tone fonts
Hold the button, point the blade upward, and turn the hilt.
1.3.2 Change BGM
Point the blade down, hold the button, and rotate the hilt.
1.3.3 Enter boot status
Twist on.
1.4 Gesture control in active mode
1.4.1 Twist off
Twist off.
1.4.2 Change blade color
Point downward, squeeze, hold, and rotate the handle.
1.4.3 Force
Hold the button, point the blade upward, and turn the hilt.
1.4.4 FOC
Tilt the blade.
1.4.5 Drag
Tilt the blade while holding the button.
1.4.6 Melt
Hold the button and push the blade horizontally forward.
Two-button operation
PWR Button: Main Button, Power Button.
AUX Button: Auxiliary Button, Function Button.
(When the buttons are distributed up and down: Upper button is the main button, lower button is the AUX button; When the buttons are distributed left and right: Left button is the main button, right button is the AUX button)
2.1 While blade is in standby mode
2.1.1 Switch sound fonts
Click the AUX button.
2.1.2 Adjust the volume
To access the volume adjustment mode, simultaneously press and hold the Main and AUX buttons. When the beep sounds, release the buttons. To adjust the volume, click the Main button to make it louder and the Sub button to make it quieter. Hold down the Main and AUX buttons until the beep sounds, then release them to exit this mode.
2.1.3 Change the boot effect
Once the beep sounds, press and hold the Main button for one second before releasing it.
2.1.4 To change the blade effect
After hearing the beep, press and hold the sub button for one second before releasing it.
2.1.5 Power Save Mode
automatically switches to low power mode after ten minutes of inactivity.
2.1.6 Enter Boot Status
Click the button after entering standby mode.
2.1.7 Power off
Click the AUX button three times.
2.2 While blade is active
2.2.1 Power off
Click the Main button.
2.2.2 Blaster
Click the AUX button.
2.2.3 Lock
Once the beep sounds, press and hold the main button for one second before releasing it.
2.2.4 FOC Off/On
By simultaneously pushing and holding the main and AUX buttons, FOC can be turned on or off.
2.3 Gesture operation in standby mode
2.3.1 Change the sound fonts
Point the blade up, hold the AUX button, and rotate the hilt.
2.3.2 Change BGM
Point the blade down, hold the AUX button, and rotate the hilt.
2.3.3 Enter boot status
Twist on.
2.4 Gesture operation in active mode
2.4.1 Twist off
Twist off.
2.4.2 Change Blade Color
Point the blade down, hold the AUX button, and twist the hilt.
2.4.3 Force
Point the blade up, hold the AUX button, and rotate the hilt.
2.4.4 FOC
Tilt the blade.
2.4.5 Drag
Hold the main button and tilt the blade.
2.4.6 Melt
Hold the AUX button and push the blade horizontally forward.
Note: For further information on how to use the lightsaber safely and in detail, please consult the user handbook that comes with it.
Proffie V2.2 Saber Operation Manual Rev.1.1
It should be noted that lightsabers often have three states: active, standby, and off.
When your saber is in standby mode, the blade is not in use but it is still on and accepting inputs.
When your saber blade is in active mode, the LED is lighted and, if enabled, producing sound.
PWR Button: Main Button, Power Button.
AUX Button: Auxiliary Button, Function Button.
(When the buttons are distributed up and down: Upper button is the main button, lower button is the AUX button; When the buttons are distributed left and right: Left button is the main button, right button is the AUX button)
1 Two-button operation
1.1 Main operation
1.1.1 Power On/Off
Verify that the batteries are in the lightsaber properly, and listen for the beep that signifies standby mode. When not in use, it's advised to take the batteries out of the lightsaber.
1.1.2 Activate/Deactivate Lightsaber
You may toggle the lightsaber on or off by pressing and releasing the primary button.
1.1.3 Mute Mode
Double-clicking the main button will start mute mode and turn the lightsaber on silently when it is off.
1.1.4 Motion Control
To turn on or off the lightsaber, turn the handle.
1.2 While blade is in standby mode
1.2.1 Adjust the Volume
To enter or exit the volume adjustment mode, long press and hold the main and auxiliary buttons simultaneously until you hear a "beep" sound. To boost the volume, briefly push the main button; to decrease it, briefly press the auxiliary button.
1.2.2 Switch Sound Effects
Single-click the auxiliary button.
1.3 While blade is active
1.3.1 Blaster Block
Single-click the AUX button.
1.3.2 FOC (Flash-on-Clash)
The lightsaber will automatically flash white and emit a sound when it comes into touch or collides.
1.3.3 Drag Floor Effect
Press and hold the primary button while tapping the blade's tip.
1.3.4 Background Music
Long press the main button to activate or deactivate the background music.
1.3.5 Change Color
Hold down the Auxiliary button while the lightsaber is on, then swiftly hit the Main button. To alter the lightsaber's color, slowly turn the hilt after hearing the prompt sound. After the prompt sound, simply press the main button to end the color change mode.
One button operation
2.1 Main operation
2.1.1 Initial Setup
Verify that the battery is inserted correctly and that the prompt sound is audible. Make sure the lightsaber is in standby mode. When not in use, it is advised to take the battery out of the lightsaber.
2.1.2 Motion Control
To open or shut the lightsaber, quickly move the handle with your right hand, then your left.
2.2 While blade is active
2.2.1 Close Blade
Long press the button.
2.2.2 Blaster Block
To activate the blaster, click the button; to lock-up, hold down the button and tap the lightsaber.
2.2.3 Stab
Thrust the lightsaber horizontally forward.
2.2.4 Melt
Press the button and advance the lightsaber.
2.2.5 Lightning Block
Press and hold the button twice, then let go.
2.2.6 Drag Floor Effect
Press and hold the button while tapping the blade's tip.
2.2.7 Force
Raise the blade to the surface, depress the button, and quickly rotate the handle to the left and right.
2.2.8 Change Color
Depress the button, crank the handle fast, and push the blade down. To alter the color of the blade, slowly rotate the handle after hearing the cue sound. To lock the color, quickly turn the handle after pressing and holding the button one more.
2.2.9 Battle Mode On/Off
Press the button three times, and then press it once more.
2.3 While blade is in standby mode
2.3.1 Turn On
Click the button.
2.3.2 Turn BGM On/Off
Double-click the button.
2.3.3 Silent Open Blade
Press and hold the button twice, then let go.
2.3.4 Switch Sound
Release the button after pressing it.
2.3.5 Volume Adjustment Mode
To activate the volume adjustment mode and hear the "drop" prompt, press the button and tap the lightsaber. To adjust the volume, click the button and hold it down for a lower volume. To end the volume adjustment mode and hear the "drop" prompt, press the button once more and tap the lightsaber.
2.3.6 Power Prompt
Triple-click the button
Note: For further information on how to use the lightsaber safely and in detail, please consult the user handbook that comes with it.
Proffie vs Neopixel: Which Lightsaber Tech is Right for You
When discussing lightsabers, it's important to take into account their many variations and configurations. Many fans of the real lightsaber are actually not very familiar with it, especially when it comes to the confusion between Neopixel and Proffie lightsabers. This article will go into detail about the connections and differences between Neopixel and Proffie lightsabers, making it easier to understand and more convenient to use. In order to help you pick between the Neopixel and Proffie sabers and give you a better understanding of both, this essay will go into great detail about their differences and connections.
What are Neopixel and proffie lightsabers?
Prior to deciphering the distinctions between the two, it is imperative that we ascertain the definitions of Neopixel and Proffie lightsaber. Once these are established, it becomes effortless to differentiate between the two.
The lightsaber community did not inspire the name Neopixel. Nonetheless, lightsaber aficionados now frequently refer to lightsabers as having LED strips inside their blades. There are other distinct applications of that technology, such as Golden Harvest, Proffie, Xenopixel, and others. Thus, one of those technologies is meant when the term Neopixel is mentioned about lightsabers.
To begin with, Neopixel truly refers to a particular kind of blade. This type of blade differs from the RGB saber's blade in that it is made of LEDs and is distributed between several LED lights. As a result, the ignition effect of the RGB saber is different, giving rise to a different effect.
The proffie saber sets itself apart from the RGB and SN V4 variants with its distinct saber configuration. It is not the same as the Neopixel lightsaber in certain ways, but since it uses Neopixel blades, it is still a Neopixel. All of the features of a Neopixel saber are essentially included in the proffie saber; however, not every Neopixel saber has the same functionality as a proffie saber. For that reason, the main focus of this essay is the differences between the Neopixel saber's proffie and ordinary versions.
NEOPIXEL OR BASELIT?
Although the traditional RGB (baselit) lightsaber is adequate for active fighting, wealthy collectors will find the new neopixel technology far more appealing. With a brighter light and a unique radiance akin to what we've all loved in the movies, using a neopixel lightsaber offers a far richer experience.
Neopixel not only makes a lightsaber brighter, but it also adds versatility to its design. Neopixel sabers are made with many LED strips inside the blade as opposed to only the hilt. This implies that you have many greater options for colors, special effects, and customized animations.
Difference between Proffie and Neopixel Lightsabers
![]()
The most crucial first step is to distinguish between a Neopixel and a Proffie lightsaber. To put it simply, a Neopixel is a unique blade, while a Proffie is a particular kind of lightsaber core. While all Proffie lightsaber blades are Neopixel blades, they aren't always Proffie sabers; they could also be SN v4 blades.
A number of embedded LEDs set the Neopixel apart from the RGB, making it a superior blade that enables more intricate and varied lighting effects. The Proffie, the saber's central component, has the ability to be altered beyond its current capabilities, allowing users to modify the blades' color and sound. It also has an excellent soundboard that produces a unique sound effect.
Proffie vs Neopixel: Differences in Sound Version
Proffie lightsaber can be customized. The Proffie is an open-source platform with customizable fonts, blade styles, and other effects.
While the standard Neopixel cannot be altered on its own and has pre-installed sounds, it might be a better option for people who are not familiar with programming.
Proffie vs Neopixel: Difference in Blades
The standard Neopixel lightsaber offers a wide range of color options for the blade effects; the Neopixel can be changed from one color to another, and the different colored blades create a variety of visual effects; forms of the saber, like Djem So or Juyo, can be rendered smoothly, which when paired with the different colored blades, creates an amazing visual experience.
The Proffie saber, on the other hand, offers a greater range of customizable blade styles. More aggressive tactics are better suited for blades like Flame and Unstable, and Proffie owners can entirely customize the appearance of their blades to match their distinctive combat form.
Proffie vs Neopixel: The Dueling Experience Difference
The Neopixel lightsaber is a fantastic tool for fighting; its complex designs and shifting colors will make you stand out in combat. The Neopixel flashes a bright light simultaneously as if it were coming from your fingertips during moves like Soresu or Ataru, which makes for an incredibly comfortable dueling experience.
Though the Neopixel saber has a striking appearance, the Proffie offers a more intense fighting experience. Dueling is made incredibly lifelike by advanced technologies, such as impact sensors that faithfully replicate the crackling sound of swords colliding. The blade's intricate touch effects improve the dueling experience even more. Similar to a genuine combat, the clash detection feature keeps swords from locking up and causing injury. Proffie lightsabers, which are designed to provide a greater degree of immersion, are unmatched fighting tools for fighters aiming to learn more aggressive forms like Juyo or Vaapa.
WHAT CAN YOU DO WITH A NEOPIXEL LIGHTSABER?
First off, if necessary, you can engage in some light to medium level dueling. Although some damage is possible due to the flexible LED structure inside the blade, we advise against recreating the entire Darth Maul combat scenario.
Neopixel lightsabers provide cosplayers and collectors with a dream come true outside of combat. Your creativity is the sole restriction on the various configurations of blaster bolt deflection, unstable blade effects, animations, and blade scrolling effects.
Neopixel allows you to create a fully customizable lightsaber that imitates your preferred George Lucas character or, for a more customized experience, you can create an avatar outside of canon.
These constructions have the benefit of having separate LEDs that may be individually controlled for various effects. With this, you have far greater adaptability than with regular RGB baselit lightsabers. Everything else about the build is much the same. All of the electronics, batteries, and soundboards needed to improve your lightsaber experience are still housed in the hilt.
Neopixel technology is more power-hungry than RGB lightsabers, so bear that in mind. Despite using LED technology, they will consume up a battery more quickly. Consider bringing extra batteries if you intend to use your Neopixel lightsaber during a cosplay event or party.
Conclusion
In summary, the proffie lightsaber is a kind of Neopixel saber, but it's critical for buyers to recognize the distinctions between the two. Programming settings and customisation are supported by the proffie saber, which is crucial for individuals who enjoy creating their own lightsaber effects.
FAQs
1.What is a Proffie lightsaber?
A particular kind of modified saber known as a Proffie lightsaber makes use of the Proffieboard, an open-source sound and motion controller board made especially for fans. It has sophisticated blade profiles, sound effects, and customizing possibilities.
2.What are Neopixel lightsabers?
Neopixel blade technology is a feature of neopixel sabers. Neopixel blades have an inside string of individually addressable LEDs that enable more realistic ignition and retraction effects as well as scrolling patterns, making them more colorful and adaptable.
3.Can Proffie lightsabers utilize Neopixel blades?
It is possible for Proffie lightsabers to work with Neopixel blades. With the use of Neopixel technology, the Proffieboard offers a multitude of customizable blade effects, including color, intensity, flicker, and more.
4.Can I change the sound fonts on a Proffie lightsaber?
Yes, changing the sound typeface on a Proffie saber is one of its benefits. Sound fonts are sets of recorded sounds with various sword sound effects. By using the Proffieboard, you may customize the sound effects of your lightsaber and create a one-of-a-kind experience by switching between different sound typefaces.
5.How do Neopixel blades differ from traditional lightsaber blades?
Neopixel blades are not like regular lightsaber blades in that they have an inside strip of individual LEDs. More sophisticated and adjustable lighting effects are now possible, such as the ability to display various colors along the blade, create dynamic patterns, and create smooth color transitions.
6.Can Neopixel blades be removed from the hilt?
Neopixel blades can usually be taken out of a lightsaber's hilt by unscrewing or detaching them; this depends on the design and method of attachment. This makes it possible to store and move the saber more easily.
7.Are Proffie and Neopixel lightsabers suitable for dueling?
Dueling with Proffie and Neopixel lightsabers depends on how well-made and durable they are. Certain models are made with stronger materials to resist the impact of battle and are specifically intended for dueling. Before partaking in a strenuous dueling, it is crucial to review the manufacturer's specifications and recommendations.
8. Can I control Neopixel colors using Profffie?
A: Yes, Profffie allows dynamic color customization.
9.How is the Neopixel blade different from a traditional lightsaber blade?
Neopixel lightsabers are not like conventional lightsabers in that they employ an internal LED strip that is independent from the lightsaber itself. This makes it possible to create more intricate and adaptable lighting effects, such as dynamic patterns, seamless color changes, and the capacity to change the lightsaber's color.
Can Proffie boards control Neopixel lightsabers?
Neopixel lightsabers can be controlled by profi boards to produce better sound and lighting effects.
Are there any specific tools required for Proffie board customization?
Basic programming knowledge is necessary for customizing Proffie boards, and uploading your configurations to the device is done through an app like the Arduino IDE.
Do Neopixel lightsabers require special care or maintenance due to their advanced technology?
Neopixel lightsabers need to be handled cautiously to prevent damage to the internal LED strips and to prevent forceful hits.
Is there a community or forum where I can learn more about customizing Proffie lightsabers?
Indeed, there are a number of internet communities and forums devoted to customizing lightsabers, including thorough talks about programming the Proffie board.
Can Neopixel lightsabers be used in lightsaber duels, or are they too fragile?
Neopixel lightsabers are suitable for light-to-moderate battling and are often robust. Nevertheless, caution is advised because LED strips may be more fragile than conventional lightsaber technology.
All 7 Lightsaber Combat Forms Explained (& Who Used Which)
Throughout the Star Wars Saga, we witness Jedi and Sith lords employing distinct battle techniques. Some prioritize quickness and accuracy, some have an impregnable defense, while some are highly attacking. These fighting techniques are derived from several lightsaber combat forms that developed over the ages to resist the looming threat of Dark Jedi's and rising Sith lords.
The Star Wars Saga taught us that there are seven different types of lightsaber battle. The methods and strategies used by each kind vary from one another. Learning one type of lightsaber fighting can take years. Every Jedi or Sith was seen using at least one lightsaber combat form throughout the series, except for a few who learned multiple forms.
Let's discuss the various types of lightsabers, their advantages, drawbacks, and users.
Form I: Shii-Cho
Form I, sometimes referred to as the Sarlacc way or the determination form, is the original lightsaber combat form. A Sarlacc is a Tattoine creature that waits for its meal while hiding in the ground. The same beast from which Boba Fett emerged in the television series "The Book of Boba Fett." This beast was given the name "Way of the Sarlacc" because of its tenacity.
Following the Sith Lords, the Jedi council initially established Shii-Cho, and the number of Dark Jedis increased. The discovery of lightsabers, which replaced the antiquated metal swords, gave rise to the Shii-Cho form.
Unlike metal swords, which can only cut in one direction, lightsabers can now cut from all angles thanks to this innovative design. Shii-Cho was limited to simple offensive and defensive maneuvers. The Shii-Cho Form only offers simple strikes and blocks of another lightsaber, just like the archaic metal swords.
Form Given that it could effortlessly cut any melee weapons, such as clubs, swords, and the like, I was a success. Shii-Cho's development enabled Jedis to eliminate several adversaries. Shii-Cho was created with the sole purpose of disarming and destroying the opponents' weaponry, not killing them.
Limitations
Initially, Shii-Cho's innovation worked incredibly well. It made it easier for the Jedi to overcome the adversaries and maintain the Sith's dominance. Although it was fantastic, things weren't supposed to remain this way long.
Over time, the Sith lords learned the Shii-Cho Form and began to adjust to the lightsabers. Jedi battles had become more complex. Jedis was now more concerned with surviving the struggle than with disarming the adversary. The second Form of fighting was created as a result of these circumstances. More sophisticated, this design was appropriate for head-to-head lightsaber battles.
Who Used Shii-Cho?
Shii-Cho was only able to receive beginner training when the other combat forms were developed, and Jedi were involved in those more complex forms. similar to "Phantom Menace."Master Yoda was teaching the younglings Shii-Cho standard Form.
A proficient master of Form I Form engages in a head-to-head battle with any other combat Form practitioner despite the fact that it is simpler and more fundamental than other fighting forms.
Kit Fisto is a good illustration. During the Clone Wars, Kit Fisto was a form I skilled Jedi. He nearly used Form I l Form saber fighting to beat General Grievous. In addition to Fisto, noteworthy figures who have used Form I l Form saber combat include Obi-Wan Kenobi and Meera Sutrik.
Shii-Cho was indeed less skilled and less frequently utilized in lightsaber duels, although Jedi often employ it in unwinnable battles. They were informed that Shii-Cho would work if nothing else worked. Despite having to rely on the fundamentals of lightsaber combat forms, the determination form requires one to remain resolute.
Form II: Makashi
Makashi, sometimes referred to as the manner of Ysalamiri and the conflict form, is the second type of lightsaber fighting. The lizard-like Ysalamiri could defend against Force strikes by forming a defensive Force bubble. The Jedi order called Form II "the Way of Ysalamiri" in honor of Ysalamiri's tenacity.
In reaction to the Shu-Chii Form's ineffectiveness in lightsaber duels, Makashi was created. More than any other form, Makashi concentrates on lightsaber vs. lightsaber duels.
It is a graceful style of fighting that takes a great deal of practice to become proficient at. Makashi Form is all on accuracy and precision strikes on unprepared opponents and disarming them, in contrast to the Shu-Chii, which is more akin to wild lightsaber blows.
Makashi is a technical style that calls for flawless footwork and quick reflexes. With this Form, I learned how to escape lightsaber attacks easily.
The primary goal of this Form was to spend the least amount of energy possible to evade Shii-Chu users' awkward attacks. A Shu-Chii user exhausts himself against a Makashi user who blocks every strike with basic footwork since Shu-Chii is all about random attacks.
Limitations
Makashi did, in fact, excel at close-quarters lightsaber battle and remained valuable for a considerable amount of time until the new dangers began to reappear. Sith lords would soon have access to technology weaponry that could be used at greater ranges.
This time, adversaries showed up with deadly ranged weaponry, such as the droids, and projectile weapons like blaster rifles. Makashi was not sufficiently developed for long-range assaults, but he was effective in close combat, particularly when facing another lightsaber.
The Makashi kind of lightsaber proven to be inadequate and unreliable when Galaxy technology advanced dramatically. Jedi fumbled with their lightsabers to block blaster rounds. Makashi was not the Jedi's preferred Form; an Form is necessity led to the creation of the third lightsaber form. Like Shii-Chu, Makashi was exclusively accessible to a select group of students.
Who Used Makashi
Count Dooku, sometimes referred to as Darth Tyrannous, is a well-known user of the Form II Lightsaber, Makashi. The separatist army, which began as a Jedi separatist, was led by him. It was later discovered that he became an apprentice to Darth Sidious and had an evil side.
Count Dooku used a single conventional lightsaber and was a very proficient Makashi Form user. He disarmed his opponents with little effort, as we saw. In the Clone Wars, he handily defeated Assajj Ventress and the Night Sisters. Count Dooku appeared to be in control of everything, even when facing off against Obi-Wan and Anakin Skywalker, without sacrificing the accuracy of his strike.
The Makashi form was also acquired and mastered by Qui-Gon Jin, Count Dooku's Padawan: Cin Drilling, a Jedi Master, similarly masters Makashi.
Makashi is still regarded as one of the most excellent lightsaber combat forms and is very successful against Sith lords, even though it is limited against ranged attacks. This Form can defeat a mighty Sith lord, but it might not protect you against a blaster.
Combat Form III: Soresu
Soresu, sometimes referred to as the resilience form, is the third lightsaber combat form. In honor of the creature My-nocks, it is also known as "The way of the My-nock." The Jedi council developed Soresu to evade the ranged attacks. Even blaster bullets cannot penetrate the defenses of a true Soresu master. Its goal was to use a lightsaber to make a defensive shield that could stop all projectile attacks.
Form II Makashi is the ancestor of Soresu, which depends on its accuracy and agility. Soresu is constantly employed as a defense, in contrast to Makashi. Soresu improves the user's reflexes and awareness of his environment. Originally thought to be a form that would enable you to combat blaster attacks while wielding a lightsaber, Soresu has developed to the point where it can even deflect bullets.
Soresu, the third type of lightsaber fighting, only permits the use of a lightsaber to maximize defense; it does not permit wild strikes or even precise slashes. A person who uses Soresu trains his reflexes and himself more than the typical person. Before the bullet is fired, a Soresu master Jedi is supposed to assume the blaster deflecting position. Because of his quick reactions and agility, a Soresu user is reported to be able to defeat up to 20 opponents by himself.
In order to deflect any bullet coming from any direction, Soresu users maintain the blade close to their body. They keep their body in such a way as to minimize the exposure of their body to any ranged blaster.
Limitation
Even while the Soresu forms shielded you from a variety of ranged attacks, they weren't unbeatable. The goal of the Makashi form is to counter lightsaber attacks and create an offensive gap. But the Soresu form is finished and solely focused on defense. "Offense is the best defense," as the saying goes. Although Soresu could deflect bullets, he was powerless to stop the lightsaber's assault maneuvers.
Other lightsaber forms were created in order to fix all of Soresu's flaws as a result of this constraint.
Who uses Soresu
Soresu is a shape that has no offensive potential but permits maximum defense. To survive the blasters on a technologically advanced planet, you also need to master Soresu.
Every Jedi learns Soresu by fusing various lightsaber fighting techniques. We have seen countless films and television shows since the first one was broadcast in the 1970s. It shows all of the Jedi and Sith avoiding the shots with ease.
Well-known figures who are proficient in the Soresu form are Grand Master Yoda and Obi-Wan Kenobis. They might have been able to survive Order 66 when others failed because of this as well. The others were unable to deflect the bullets from behind him, but he did.
Combat Form IV: Ataru
The fourth lightsaber combat form, or aggression form, is called ataru. It was also dubbed "the way of the Hawk-bat" in reference to that animal's violent hunting style.
Unlike Form I, the Jedi had mastered lightsaber combat forms by the time Form IV was created. Initially, the fight involved slurry strikes and sporadic slashes because the Form I Form lightsaber combat had not sufficiently developed. Additionally, Jedi had not yet been adequately trained in the ways of the Force.
One of the seven advanced lightsaber combat styles, Ataru, requires a blend of Force and lightsaber capabilities. To acquire Ataru form, Jedi's have to undergo training in the ways of the Force. Only after mastering the fundamentals of earlier lightsaber fighting styles could they become proficient in Ataru.
Ataru is an offensive form that permits continuous lightsaber attacks until he finds a gap, as the name "aggression form" indicates. With a barrage of lightsaber slashes, an Ataru practitioner should be able to overwhelm his opponent and win in a matter of seconds.
Ataru's strikes, in contrast to Shii-Cho's, are constant and accurate while preventing the opponent from seeing an opportunity. An Ataru practitioner can strike the opponent from unexpected angles while maintaining defense by combining their Force talents.
To effectively master Ataru, a combination of Form III is also necessary. Ataru permitted the Jedi's to advance on the adversaries while thwarting projectile attacks such as blaster shots, whereas Soresu permitted the defensive. For a long time, the Jedi were able to win by combining offensive and defensive tactics with the ability to approach the opponent quickly.
Limitations
In fact, of all the earlier forms of lightsaber fighting, Ataru, the Form IV, was the most sophisticated. It worked incredibly well against both the ranged attacks and the Smiths. However, it had drawbacks of its own.
It took a great deal of training to learn how to attack the opponent quickly and continuously while completely deflecting incoming attacks. But even with its Force powers, Ataru was limited before its shortcomings were revealed.
Even though Ataru's offensive was unrivaled, it was hard to maintain the same defense against constant lightsaber strikes. The Jedi may dominate battles, but only for a while before blaster rounds defeat them. The Jedi council began perceiving new Forms that led to other forms since they could not risk the Jedi's fighting in the thick of the conflicts with Ataru.
Who uses Ataru?
Until the fall of the Jedi order, many Jedis and Sith lords trained Ataru, the fourth Form of Form t-saber dueling. Qui-Gon Jin and his apprentice Obi-Wan employed Ataru form against Darth Maul, as demonstrated in the film "Phantom Menace."
With relentless lightsaber attacks and a furious charge forward, Obi-Wan vanquished Maul. He ultimately threw Maul out of the ship after severing his dual-phase lightsaber in two.
Many famous Jedis and Sith lords use Ataru, one of the most sophisticated lightsabers, despite his limitations.
Form V: Shien & Djem
The lightsaber combat form's fifth Form is Formed by Shien & Djem. It is sometimes referred to as the perseverance form. "The way of Krayt Dragon" was another name for it. To solve the offense problem of its previous Form, SoForm, Form IV was created. Form IV offered the offense, but it was unable to maintain the same defense.
Form V: Shien and Djem is the outcome of yet another attempt to address this Soresu form issue. Ataru was created from the ground up in order to address the Soresu problem. But Shien and Djem So was modified in defense and was derived from Soresu (Form III).
Shien and Djem are the two halves of Form V. Djem So concentrates on the offense, while Shien keeps the defense as formidable as Soresu. The Jedi used Shien to deflect the blasters and became so precise that they were able to hit their opponents with their bullets and redirect the bullets back to their original location.
Unlike Form III Form which focused more on defense alone, Shien's approach was to overwhelm their opponent with an unexpected offensive maneuver. Shien's ability to deflect shots back to the opponent was exceptional, but it was made with Makashi (Form II) in mind so that it could attack with the precision of a lightsaber wielder. As a result, the second section, Djem So, was written after Shien.
Limitations
Djem So concentrated on taking on the opponent head-to-head and controlling him using a mix of offensive and defensive techniques, whereas Form II placed more emphasis on blocking and spotting a gap to deliver a precise blow.
Djem & So practitioners are supposed to switch between offense and defense while maintaining their defense. Thus, Soresu's defense and Makashi's accuracy are the focus of Form V. The goal is to use exact brute Force to overwhelm the enemy and put him in a position where he may be vanquished.
Since Makashi was very hard to learn and Soresu was not offensive, the Jedi council preferred Form V above both.
To put it briefly, Shien and Djem So were developed to solve every problem that arose in earlier iterations. Ataru (Form IV) and Shii-Cho (Form I) pushed their way forcefully. Makashi (form II) Form led against blasters, whereas Soresu (Form II concentrated on patience and defense. Shien and Djem So were able to manage any scenario properly. A practitioner of Shien and Djem So maintained his defensive and pushed his way forcefully without showing any weakness.
Who uses Shien and Djem So?
One well-known figure who trained Shien and Djem So was Anakin Skywalker. Even though he was proficient in Ataru and Form IV, his Shien and Djem So forms were very different. Several times, including against Ezra Bridger in "Rebels," he was observed redirecting the rounds back to droids.
Ahsoka Tano, Anakin's Padawan, is another well-known figure. Despite using two lightsabers, her reverse grip style made Form V easy for her to learn. Ahsoka was among the many Shien and Djem practitioners who employed the reverse grip approach to aid in both their offensive and defensive strategies. She held it in reverse with a single yellow-green Shota lightsaber.
Form VI: Niman
Niman, often referred to as the diplomat's Form, the the Form deration Form, or the way of the Rancor, is the sixth Form of Form lightsaber. The sixth lightsaber form, Niman, was a hybrid that could sense every lightsaber form that had come before it. From Shii-Cho (Form I) to Form Hien (form V), it incorporates characteristics of every lightsaber form.
Because Niman combined all of the key components of earlier forms into a single form, leaving no flaws, it had some advantages over other forms. However, it lacked other forms in that it did not consider any form to be perfect.
It was intended to give Jedis a well-rounded strategy in combat. It was anticipated that the Jedi would be able to both defend and offend without showing weakness. The Jedi were unable to specialize in any particular combat form, even if they could study all the fundamentals of the earlier forms. This Form is Formn known as the "jack of all trades" form because of this.
In fact, Niman, which is derived from Soresu (form III Forms typically a defense-oriented form. By fusing the aspects of Makashi and Ataru, the Jedi Order was able to maintain defense while executing quick and surprising offensive maneuvers.
Limitations of Niman
For generations, niman had been the most popular Form, am Form orca users. Ironically, because of its limits, it is also the most criticized Form. Give Form that it prevents master-level mastery in any prior form, many Jedi saw it as a drawback.
Although he can defend similarly to Soresu, a Niman practitioner's defense is far inferior. Unlike Makashi, he has dull precision and imperfect footwork. He lacks Ataru and Shien's ruthless strength in his offense. However, this is not a form of specialization; instead, it is a generalization.
Niman has shown himself to be the most helpful despite his limitations, particularly when combined with Force.
Who used Niman?
The most popular lightsaber combat form was Niman. Because it backed both the Jedi Order's and the Republic's diplomats, the Jedi Order favored it over other formats. Second, Niman made no demands regarding pro-level competence in any of the earlier versions. The Jedi found it more straightforward to master the fundamentals and some of the most critical aspects of every Form that would be useful to them in combat. In this manner, the Jedis could be ready for any unforeseen combat situation.
The pairing of Force and Niman is another factor in its adoption. In a battle, using the fundamental physical components of all the earlier forms did not deplete as much energy as using a specialized form. This made it possible for the Jedi to combine Niman with Force attacks like Telekinesis successfully. Compared to other lightsaber combat forms, the Niman form is more likely to use the Force for pushing, pulling, and repelling.
Niman has been the most widely employed lightsaber combat form from the Jedi-Sith Great War until the Clone Wars. Many Jedi view it as the most helpful type of lightsaber battle.
Like the Jedi, the Sith lords had also been using this Form. The Form and Inquisitor and Darth Maul are two well-known Sith figures who have studied Niman form.
Form VII: Juyo
Juyo, or Ferocity form, is the seventh Form of Form t-saber fighting. In honor of a creature Vonskr that was able to sense the Force energy within other beings and hunt them down to consume it, it was termed "the way of the Vonskr." The Juyo practitioners were precisely like these hunters of Force-beings.
The most challenging type of lightsaber fighting is Form VII. Direct attacks are part of this daring Form. Juyo Form expended more on mental energy than physical energy, in contrast to Ataru or Shien. It is challenging for the opponent to catch his surprising moves when a Juyo user assaults them from such angles and with such erratic behavior.
Following Form IV's brute Force, Juyo is a more kinetic and physical form. Juyo, like Shii-Cho, is exclusively interested in killing blows and lacks the concept of defense, unlike Ataru.
While appearing tranquil on the outside, the Juyo's purpose is to allow them to be absorbed into the Force and generate mental pressure. During the battle, the Jedi were supposed to let go of their mental tension in order to increase their fervor and anger. Compared to previous types, this emotional fuel increases the user's energy and attention, but it also causes them to lose their moral compass. To put it another way, Juyo was the Form that caused harm to others.
"The Dark Side is reached by rage." Originally, Juyo was used as a lightsaber fighting form. Because of this Form's sForm 'sibility to the Dark side, Juyo was later expelled from the former Jedi Order. Until Mace Windu made some changes, Juyo remained prohibited for millennia.
Form VII: Vaapad
A renowned Jedi Master and council member was Mace Windu. In addition, he was regarded as more potent than Master Yoda. Form VII Juyo was modified by Mace Windu, who called it Vaapad. What changes did Windu make, and why was reforming Juyo necessary?
Jedis were prohibited from learning Juyo after the ban, although Sith lords were not. Mace Windu understood that the Jedi were at a disadvantage to the Sith and that Juyo gave its practitioners tremendous power.
The Jedi may safely learn Juyo form when Mace Windu corrects it. He manages to let your unpleasant feelings flow without becoming unmanageable. He developed self-discipline to the point that he was able to regulate his negative feelings.
Vaapad used the same mental and physical strategies. Windu gained tremendous power from the Form, VII Form allowing his emotions to be safely fueled by his mental pressure.
Who uses Juyo and Vaapad?
Juyo was a popular lightsaber combat form among Jedi in the early days of the Jedi Order. Juyo was practiced by well-known Jedi Masters like Vrook Lamar, Kavar, and Zez-Kai Ell. The Jedi order banned Juyo as a result of the majority of those Jedis, regrettably, turning evil.
Darth Maul is one of the well-known figures to have mastered Juyo form, and Juyo was still used by those on the opposing side of the Force. He learned the Juyo form even though he was skilled in Niman.
Limitations
Regarding its altered version, the only known practitioner of Vaapad was Mace Windu. This is due in part to the fact that this Form was challenging to perfect and that the Jedi fell extinct after Order 66. Not all Jedi had the ability to express negative feelings while maintaining control over them freely.
Despite having pupils, Mace Windu never used Vaapad form with any of his disciples, including Jedi Master Depa Billaba. Vaapad, the alter ego of Juyo, likewise vanished permanently from Jedi doctrine with the deaths of Mace Windu and Depa Billaba during the Great Jedi Purge.
FAQs
What is Form I of lightsaber combat?
The fundamental Form tau Form to all Jedi is called Form I, or Shii-Cho, and it emphasizes wide, sweeping motions.
Who is known for using Form II, Makashi?
Count Dooku is well known for being skilled in Form II, which is particularly good in lightsaber dueling.
What characterizes Form III, Soresu?
Obi-Wan Kenobi is renowned for using Soresu's defensive methods.
Which form did Forma prefer?
Yoda preferred Ataru, Form IV, which is characterized by its acrobatic and dynamic moves.
What makes Form VII unique?
Mace Windu uses Form VII, Juyo/Vaapad, which is renowned for its violent and erratic strikes.
Conclusion
To sum up, the seven types of lightsaber battles accommodate various fighting philosophies and tactics within the Star Wars world. Shii-Cho, or I Form, is the foundational Form the Form l Jedi practiced. Makashi, or II Form, was Count Dooku's favored Form and Form well suited for battle. Obi-Wan Kenobi mastered the defense-oriented III Form, Soresu. Yoda employed the acrobatic IV Form, Ataru. Anakin Skywalker's V Form, Shien/Djem So, prioritizes counterattacks. Many Jedi practiced the VI Form, Niman, which strikes a balance between fighting skills and Force talents. Finally, Mace Windu employed Form VII, Juyo/ Vaapad, which is hostile. Each Form demonstrates the depth and strategic variety of lightsaber fighting.


