

You will receive an email containing the order number and logistics information
US and Europe: 10-15 days
Other Regions: 15-20 days
Expedited can be sent to DHL, 3-7 days to arrive, the freight needs to be paid by yourself. Please contact us if necessary
TRACKING
1.Once the order is shipped, please allow 1-3 business days for the tracking number to be fully updated on the post office system. Please note that your order is actually on the way and there is no delay of the package rather than the tracking number status.
2.If you encounter any problems, please contact me via email.
PRODUCT INFORMATION
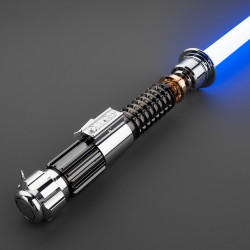
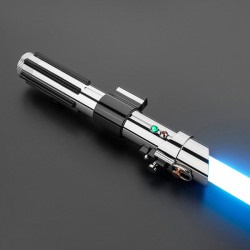
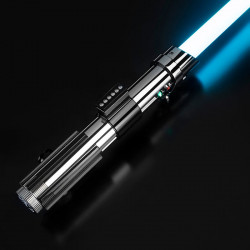
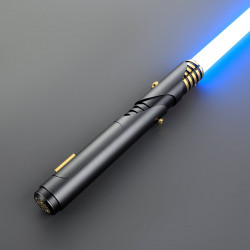
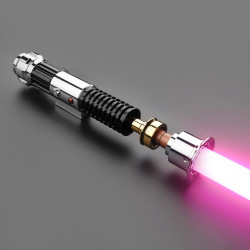
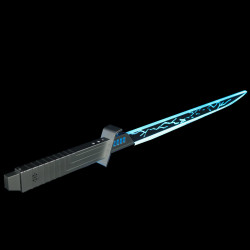
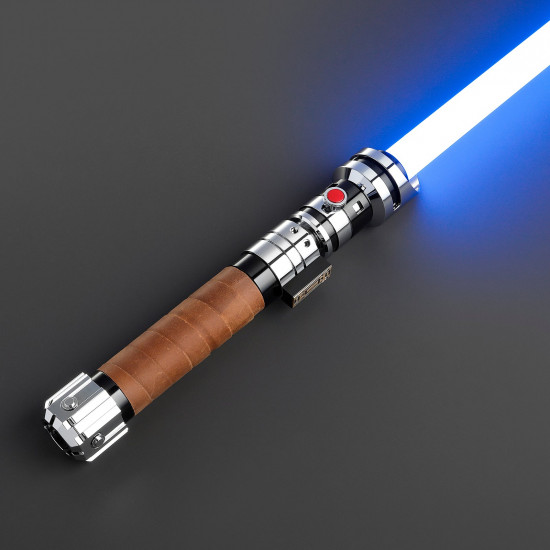
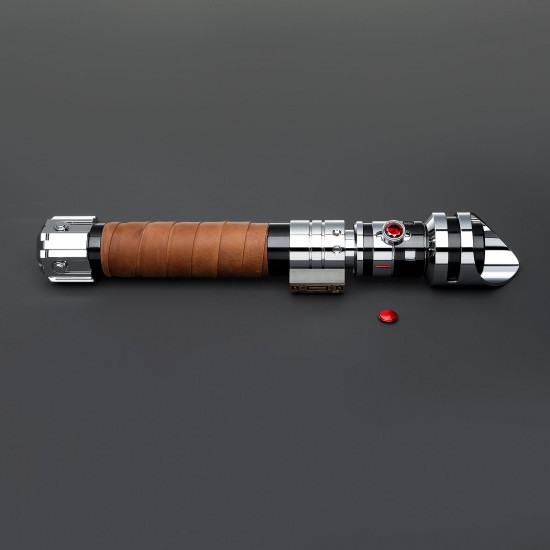
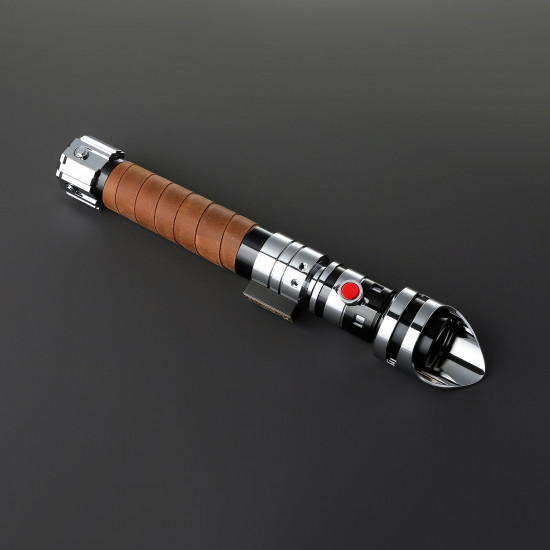
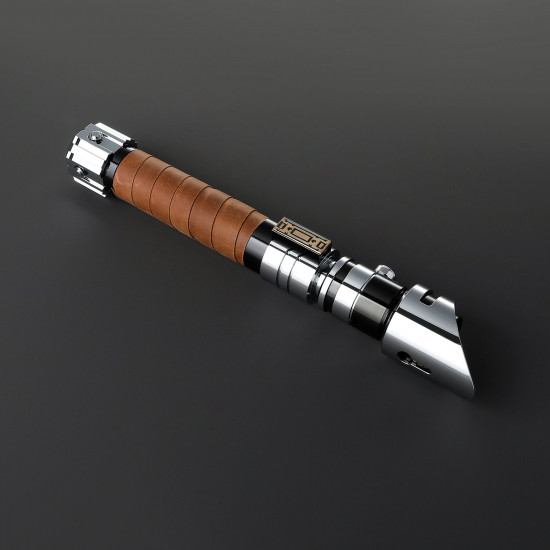
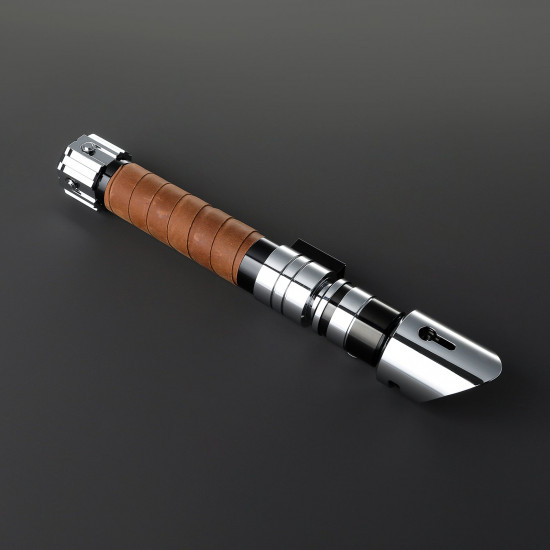
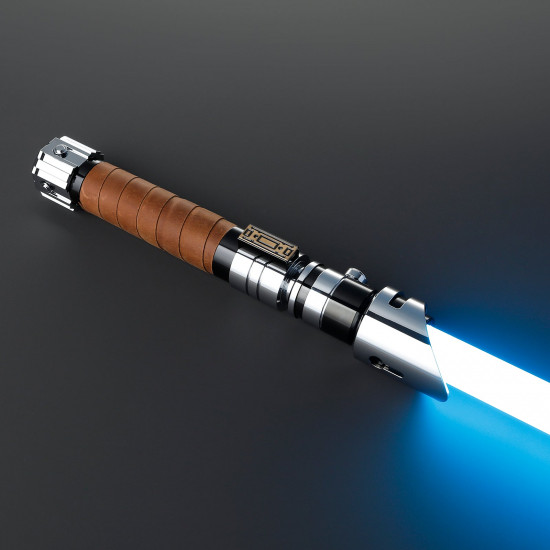
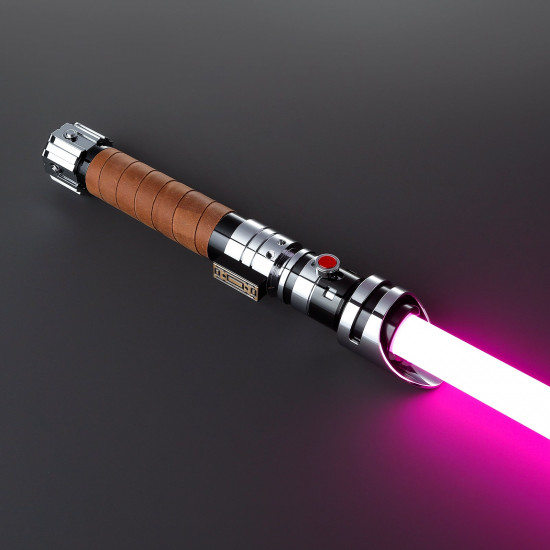
Galen Marek's lightsaber hilt, as discovered in the video game The Force Unleashed 2.
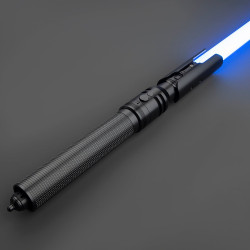
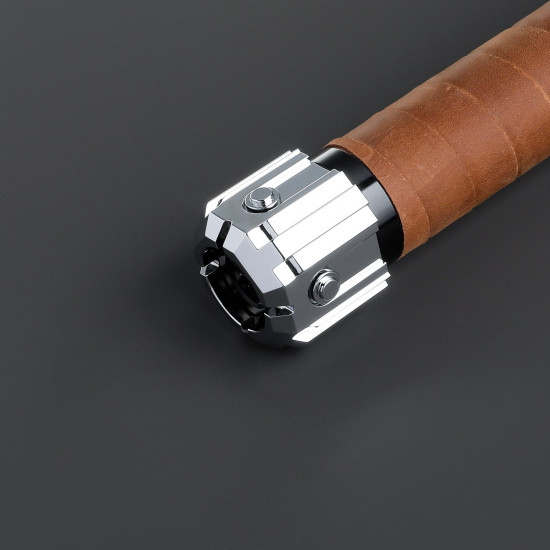
This style has a personalized leather wrap. It is, therefore, advised that you get this hilt. Over time, dueling use will cause wear and replacement of the wrap.
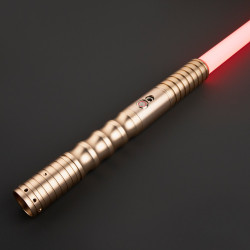
Like all others, this magnificent saber has an aluminum 6063 hilt. Each saber has beautiful finishes and sturdy construction made of durable materials, providing the best re-creation of a legendary design or an incredibly comfortable and fashionable dueling weapon.
SABER CONFIGURATIONS
Here's a simple breakdown of our available configurations.
- Standard: the Xeno 3 Baselit option is not available.
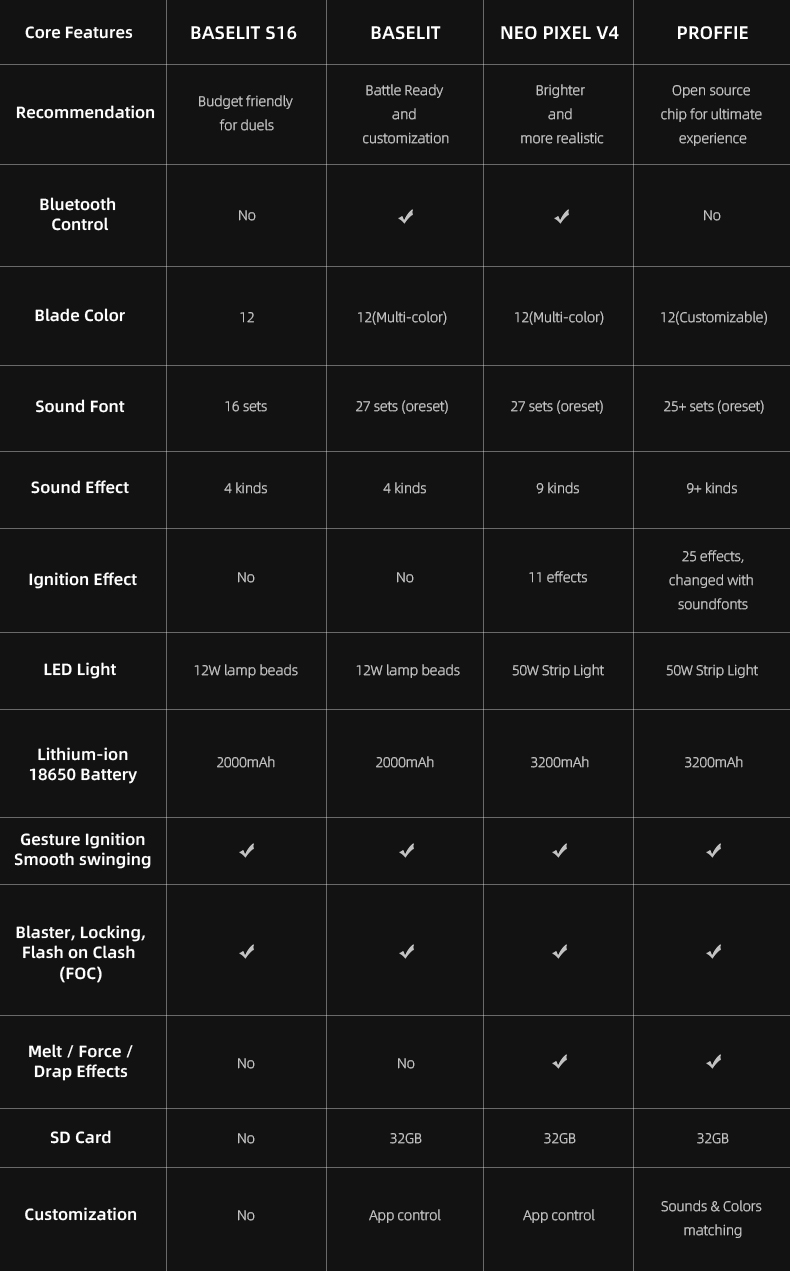
- Premium : It's the choice we want the most! The Xeno 3 board is new, but it has a Neopixel blade. The blade's high-density LED strip provides an incredible appearance and many visual effects. Currently customizable via an SD card and, as always, a mobile app.
- Deluxe: For the programmers among you, the Proffie v2.2 board offers fully programmable styles and effects with just one function button. This is the best neopixel lightsaber available. You will adore this if you enjoy getting your hands filthy (mainly with your keyboard) and customizing objects around you!
DIMENSIONS
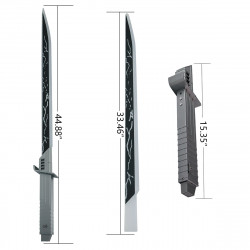
- Dimensions of the hilt: 31.5 cm / 12.4 inches in length
- Dimensions of the blade: You can select a length of 72, 82, or 92 cm (28, 32, or 36 inches) with our standard diameter of 1 inch. Standard swords have a polycarbonate thickness of 2 mm, whereas Deluxe and Premium swords have a 3 mm thickness.
- Recommended length of your lightsaber: Many fencing federations and academies stipulate that the entire length of your dueling saber must not exceed 110cm (39.4 to 43.4 inches). Typically, the blade is 5 to 7 cm (2 to 3 inches) inside the hilt. If you intend to use your saber in a formal situation, select the correct size; if this bothers you, go for the more considerable blade length, which is 36 inches or 92 cm.
USABILITY CHART
Handling and weight are important factors for duelists, and style and ease of maintenance are essential for cosplayers. Style is particularly important for collectors.
STYLE & REFINEMENT
Very few concessions were made for a lightsaber design that is gorgeous or accurate on screen.
HANDLING COMFORT
Precision of the screen and intricate design. Some elements of this hilt might feel awkward during a duel.
WEIGHT
For usage in sports, replica sabers will be too hefty due to their weight.
MAINTENANCE
A slide-out core with a Core Matrix Hub or a two-part core makes up this saber. Access for maintenance is simple enough. The core has an easily accessible charging port.
XENO3 BLUETOOTH
With this hilt design, Bluetooth communication is minimal. During the process, you must slide the pommel or remove the core to set your saber's specifications via the app.
If you have any questions about our sabers, please get in touch with us through the chat; we speak English and French.
DETAILED SPECS
MAIN FUNCTIONALITIES
All of our sabers provide the following :
- Removable polycarbonate blade
- You can choose any color for your blade with the full RGB color picker or easy-access presets.
- Volume control from 0 to 100%
- Smooth swing: These lightsabers are incredibly motion-sensitive and respond to your every move with accurate buzzing sounds.
- Numerous sound fonts and blade styles are pre-loaded, with the option to add and modify your own (Xeno3 sounds and colors, complete control over Proffie).
- Hilts are built with aluminium 6063, and CE certified.
- ON XENO3 ONLY: Free mobile app control and Bluetooth compatibility. Because of the thickness of the hilt, certain sabers have poor connectivity; the production description contains more information.
BLADE SPECS
- Baselit sabers are powered by a 12W LED module housed in the handle. Blades are designed for heavy dueling and have a diameter of 1 inch and a thickness of 2 mm.
- Neopixel blades with a full-length, high-density LED strip within are found in Premium and Deluxe sabers. See their description for additional details. Polycarbonate, either 1 inch in diameter and 3 mm thick or 7/8 inch in diameter and 2 mm thick. Although we do not recommend using the 3mm thickness for intense dueling because of the possibility of damaging the internal LED circuit, it is possible to duel with them. It is possible to purchase more blades with varying lengths, thicknesses, and widths.
- You may use the tip drag effect and smooth ignitions with the neopixel blades. The neopixel blades in Premium and Deluxe sabers also significantly improve blaster effects, flash-on-clash, and saber lockups.
BATTERY AND BOARDS
- Rechargeable 3000mAh and 3600mAh batteries can run a saber for one to three hours, depending on whether it's a profile, neopixel, or basalt saber and the effects you're using.
- Never charge a USB device using a dongle, hub, fast charger, computer, or console—always use a 1A 5v USB charger. Inappropriate power outputs and charging devices will damage your board and void the warranty.
- If the port is visible, charging the battery can be done directly on the core (slide the core out or remove the grip part) or under the pommel piece.
- Every saber comes equipped with a recharge cable.
- Stock: In Stock
- Model: starkiller-lightsaber-tfu2
- SKU: starkiller-lightsaber-tfu2
- UPC: starkiller-l
- ISBN: starkiller-lights
- MPN: starkiller-lightsaber-tfu2
Available Options
- Lightsaber Guide
- Lightsaber Operation Manual
- Core difference
- STARKILLER LIGHTSABER - All You Need to Know
Lightsaber Guide Rev.1.1
How to Choose a Lightsaber
The lightsaber's core, not the model, controls the igniting effect, sound font, color change, smooth swinging, and Bluetooth control. While lightsaber models may differ in their underlying structures, all of the lightsaber's features will remain the same as long as the core version remains the same. Every version at LaserPointerWorld has a pixel core.
Choose your preferred lightsaber model based on the hilt details.
Based on the hilt design specifics (such as character names, pattern information, and structural elements), choose the lightsaber model that best suits your needs.
Further customize the lightsaber's attributes based on your personal preferences.
A variety of hilt colors, traditional or weathered styles, 32- or 36-inch blade lengths, and straight or curved blades are available.
Select the lightsaber core that meets your functional requirements.
The core is the control center for all of the lightsaber's functions, determining the effects it can produce.
How to Use a Lightsaber
- Basic Usage
Finding the lightsaber core is the first step towards using one. You can check out LaserPointerWorld's tutorial manuals or the instructions that came with the package.
- App Control
You might also need to learn how to set up a Bluetooth connection and use an app to control lightsabers with S-RGB or SNV4 cores.

Customization
For lightsabers with SNV4 or Proffie cores, you may need to download configuration files. We provide a selection of configuration files for you to download.
- Recommended Tutorials
You can view videos tutorials from certain Jedi masters in addition to the official LaserPointerWorld tutorials. The following YouTube channel is suggested by us:
YouTube: @thefrugaljedi
After-Sales and Modifications
Since the core contains electronic chips, circuit or software issues may occur during installation. You can contact us for troubleshooting solutions.
Baselit RGB Lightsaber Operation Manual V1.1
Make sure your lightsaber has a single button or twin buttons before reading this guide.
It should be noted that lightsabers often have three states: active, standby, and off.
When your saber is in standby mode, the blade is not in use but it is still on and accepting inputs.
When your saber blade is in active mode, the LED is lighted and, if enabled, producing sound.
One button operation
1.1 While blade is in standby mode
1.1.1 Wake up
To go into standby mode, press and hold the button until the light turns on.
1.1.2 Power On
Tap the button.
1.1.3 Adjust volume (3 modes)
Once the breath indicator lights once, press and hold, then let go.
1.1.4 Change sound fonts
Once the breath light blinks twice, release the pressure that you applied.
1.1.5 Change BGM (3 types)
Release the hold after the breath light blinks three times.
1.1.6 FOC off/on
Hold and release when the breath light blinks four times.
1.1.7 Motion Control On/Off
Hold and release when the breath light blinks five times.
1.1.8 Power save mode
Hold down the button until the backlight turns off (it won't work for ten minutes).
1.2 While blade is active
1.2.1 Blaster
Tap the button.
1.2.2 Lock
After the breath light flashes once, hold down the button and let go.
1.2.3 Color Change
Hold until the breath light blinks twice, then release. Tap the button to exit this mode.
1.2.4 Change Blade Effects
Press and hold the button for three blinks of the breath light, then let go.
1.2.5 Turn Off
After the breath light flashes four times, hold down the button and let go.
1.3 Gesture operation in standby mode
1.3.1 Turn on
Twist the saber.
1.3.2 Change sound fonts
Holding the button with the blade up, twist the saber.
1.3.3 Change BGM
Holding the button pressed, rotate the saber while keeping the blade down.
1.4 Gesture operation in active mode
1.4.1 Turn off
Twist the saber.
1.4.2 Switch Blade Effects
Holding the button, twist the saber when the blade is up.
1.4.3 Change Color
Holding the button pressed, rotate the saber while keeping the blade down.
1.4.4 FOC
Strike the saber.
Two-button operation
PWR Button: Main Button, Power Button.
AUX Button: Auxiliary Button, Function Button.
(When the buttons are distributed up and down: Upper button is the main button, lower button is the AUX button; When the buttons are distributed left and right: Left button is the main button, right button is the AUX button)
2.1 While blade is in standby mode
When the batteries are inserted correctly, it beeps.
When charged properly, it beeps.
2.1.1 Power On
Tap the PWR button.
2.1.2 To change soundfonts
Tap the AUX button.
2.1.3 Adjust volume
Press and hold the PWR button, then release (mute/low volume/high volume).
2.1.4 Power save mode
Twenty minutes without operations.
2.2 While blade is active
2.2.1 Power off
Tap the PWR button.
2.2.2 Blaster
Tap the AUX button.
2.2.3 Lock
Hold down the AUX button for a moment, then let go.
2.2.4 FOC Off/On
Press and let go of the PWR button.
2.3 Gesture operation in standby mode
2.3.1 Power on
Rotate the saber.
2.3.2 Change sound fonts
Holding the AUX button while the blade is up, twist the saber.
2.3.3 Change BGM
Holding press the AUX button, twist the sword with the blade down.
2.4 Gesture operation in active mode
2.4.1 Turn off
Twist the saber.
2.4.2 Switch Blade Effects
Holding the AUX button while the blade is up, twist the saber.
2.4.3 Change Color
Holding press the AUX button, twist the sword with the blade down.
2.4.4 FOC
Hit the saber.
Note: For further information on how to use the lightsaber safely and in detail, please consult the user handbook that comes with it.
SNV4 Saber Operation Manual Rev.1.3
Make sure your lightsaber has a single button or twin buttons before reading this guide. It should be noted that lightsabers often have three states: active, standby, and off.
When your saber is in standby mode, the blade is not in use but it is still on and accepting inputs.
When your saber blade is in active mode, the LED is lighted and, if enabled, producing sound.
SNV4 Pro Lightsaber Operation Manual
One Button Operations
Charging: The power level alert will ring when you insert the charging wire. It will turn on the breathing light.
1.1 When the blade is in the power-off state
1.1.1 Switch between 82 and 92 blade types
Press the button three times in quick succession.
1.1.2 Wake up the blade
Long press the button.
1.2 While blade is in standby mode
1.2.1 Enter power-on mode
After the button has entered standby mode, briefly press it.
1.2.2 Enter power-off mode
① Press and hold the button until the blinking breathing light stops.
② Automatic shut-off after ten minutes if nothing is done.
1.2.3 Switch the volume
Once the breathing light blinks once, press and hold the button for a moment, then let go.
1.2.4 Switch power-on effects
Once the breathing light blinks twice, press and hold the button for a moment before releasing it.
1.2.5 Switch regular lighting effects
Once the breathing light blinks three times, press and hold the button for a moment before releasing it.
1.2.6 Switch sound effects
Once the breathing light blinks four times, press and hold the button for a moment before releasing it.
1.3 While blade is active
1.3.1 Enter standby mode
To put the device in standby mode, press and hold the button until the breathing light blinks four times.
1.3.2 Enter power-off mode
Hold down the button until the blinking breathing light stops.
1.3.3 Shockwave
Quickly tap the button.
1.3.4 LOCK-UP
Once the breathing light blinks once, press and hold the button for a moment, then let go.
1.3.5 Switch colors
Once the breathing light blinks twice, press and hold the button for a moment before releasing it.
1.3.6 Toggle FOC on/off
Once the breathing light blinks three times, press and hold the button for a moment before releasing it.
1.4 Gesture operations in standby mode
1.4.1 Reverse to switch sound effects
Tilt the blade upward, hold the button, and rotate.
1.4.2 Enable or disable BGM
Tilt the blade downward, hold the button, and rotate.
1.5 Gesture operations in active mode
1.5.1 Force
Hold the button, tilt the blade upwards, and then rotate.
1.5.2 Switch colors
Hold the button, tilt the blade downwards, and then rotate.
1.5.3 Drag
Tap the blade while holding down the button.
1.5.4 Melt
Press and hold the button while pushing forward horizontally.
1.5.5 Stab
Release the button and thrust forwards.
Two Button Operations
PWR button: Main button, power button.
AUX button: Auxiliary button, function button.
(When buttons are arranged vertically: upper button is the main button, lower button is the AUX button; when buttons are arranged horizontally: left button is the main button, right button is the AUX button)
Charging: Insert the charging cable, and the charging sound effect will play while the breathing light blinks.
2.1 When the blade is in the power-off state
2.1.1 Switch between 82/92 blade types
Press the main button three times quickly.
2.1.2 Enter standby mode
To switch to standby mode and hear the power-on sound effect, long press the main button.
2.2 While blade is in standby mode
2.2.1 Enter power-on mode
Press and hold the main button briefly to activate the device.
2.2.2 Enter power-off mode
To hear the power-off sound effect and switch to power-off mode, quickly press the AUX button three times.
2.2.3 Switch sound effects
Short press the AUX button once and then release.
2.2.4 Switch power-on startup effects
To hear the sound that corresponds with a successful switch, long press the main button.
2.2.5 Switch power-on default lighting effects
To hear the sound that corresponds with a successful switch, long press the AUX button.
2.2.6 Adjust volume
To access the volume setting mode, simultaneously press and hold the main and AUX buttons. push the main button briefly to raise the volume, then push the AUX button briefly to lower it. To hear the sound that indicates you are leaving the volume setting mode, press both buttons at the same time once again.
2.3 While blade is active
2.3.1 Enter power-off mode
Press the main button briefly to switch to power-off mode.
2.3.2 Shockwave
Short press the AUX button.
2.3.3 LOCKUP
To switch to LOCKUP mode, hold down the AUX button for a full second before releasing it. To get out of LOCKUP mode, briefly push the AUX button one more.
2.3.4 Toggle FOC on/off
To turn on or off FOC mode, press the main and AUX buttons simultaneously when the device is in power-on mode.
2.4 Gesture operations in standby mode
2.4.1 Reverse to switch sound effects
Tilt the blade upward, hold down the main button, and rotate.
2.4.2 Enable or disable BGM
Tilt the blade downward while holding down the main button, then spin.
2.5 Gesture control in active mode
2.5.1 Force
Hold the main button, tilt the blade upwards, and then rotate.
2.5.2 Switch colors
Hold the main button, tilt the blade downwards, and then rotate.
2.5.3 Drag
Hold the main button and tap the blade.
2.5.4 Melt
Hold the main button and thrust forwards horizontally.
2.5.5 Stab
Press the primary button and propel yourself forward.
SNV4 Lightsaber Operation Manual
One button operation
1.1 While blade is in standby mode
1.1.1 Enter standby mode
Hold down the button until the light comes on.
1.1.2 Adjust volume
Once the breath light flashes once, press and hold, then let go.
1.1.3 Toggle boot effect
Once the ventilation light blinks twice, press and hold the button for a moment, then let go.
1.1.4 Change blade effect
Press and hold until the breath light blinks three times, then release.
1.1.5 Change sound fonts
Press and hold until the inflation light blinks four times, then release.
1.1.6 Power save mode
automatically switches to power-saving mode after ten minutes of inactivity.
1.1.7 Enter boot status
Press the button to put the device in standby mode.
1.2 While blade is active
1.2.1 Blaster
Quick click on the button.
1.2.2 Lock
Once the breath light flashes once, press and hold, then let go.
1.2.3 Change Blade Color
Once the breath light blinks twice, release the pressure that you applied.
1.2.4 FOC on/off
Once the inflation light blinks three times, release the pressure that was applied.
1.2.5 Off
Press and hold until the inflation light blinks four times, then release.
1.3 Gesture operation in standby mode
1.3.1 Change tone fonts
Hold the button, point the blade upward, and turn the hilt.
1.3.2 Change BGM
Point the blade down, hold the button, and rotate the hilt.
1.3.3 Enter boot status
Twist on.
1.4 Gesture control in active mode
1.4.1 Twist off
Twist off.
1.4.2 Change blade color
Point downward, squeeze, hold, and rotate the handle.
1.4.3 Force
Hold the button, point the blade upward, and turn the hilt.
1.4.4 FOC
Tilt the blade.
1.4.5 Drag
Tilt the blade while holding the button.
1.4.6 Melt
Hold the button and push the blade horizontally forward.
Two-button operation
PWR Button: Main Button, Power Button.
AUX Button: Auxiliary Button, Function Button.
(When the buttons are distributed up and down: Upper button is the main button, lower button is the AUX button; When the buttons are distributed left and right: Left button is the main button, right button is the AUX button)
2.1 While blade is in standby mode
2.1.1 Switch sound fonts
Click the AUX button.
2.1.2 Adjust the volume
To access the volume adjustment mode, simultaneously press and hold the Main and AUX buttons. When the beep sounds, release the buttons. To adjust the volume, click the Main button to make it louder and the Sub button to make it quieter. Hold down the Main and AUX buttons until the beep sounds, then release them to exit this mode.
2.1.3 Change the boot effect
Once the beep sounds, press and hold the Main button for one second before releasing it.
2.1.4 To change the blade effect
After hearing the beep, press and hold the sub button for one second before releasing it.
2.1.5 Power Save Mode
automatically switches to low power mode after ten minutes of inactivity.
2.1.6 Enter Boot Status
Click the button after entering standby mode.
2.1.7 Power off
Click the AUX button three times.
2.2 While blade is active
2.2.1 Power off
Click the Main button.
2.2.2 Blaster
Click the AUX button.
2.2.3 Lock
Once the beep sounds, press and hold the main button for one second before releasing it.
2.2.4 FOC Off/On
By simultaneously pushing and holding the main and AUX buttons, FOC can be turned on or off.
2.3 Gesture operation in standby mode
2.3.1 Change the sound fonts
Point the blade up, hold the AUX button, and rotate the hilt.
2.3.2 Change BGM
Point the blade down, hold the AUX button, and rotate the hilt.
2.3.3 Enter boot status
Twist on.
2.4 Gesture operation in active mode
2.4.1 Twist off
Twist off.
2.4.2 Change Blade Color
Point the blade down, hold the AUX button, and twist the hilt.
2.4.3 Force
Point the blade up, hold the AUX button, and rotate the hilt.
2.4.4 FOC
Tilt the blade.
2.4.5 Drag
Hold the main button and tilt the blade.
2.4.6 Melt
Hold the AUX button and push the blade horizontally forward.
Note: For further information on how to use the lightsaber safely and in detail, please consult the user handbook that comes with it.
Proffie V2.2 Saber Operation Manual Rev.1.1
It should be noted that lightsabers often have three states: active, standby, and off.
When your saber is in standby mode, the blade is not in use but it is still on and accepting inputs.
When your saber blade is in active mode, the LED is lighted and, if enabled, producing sound.
PWR Button: Main Button, Power Button.
AUX Button: Auxiliary Button, Function Button.
(When the buttons are distributed up and down: Upper button is the main button, lower button is the AUX button; When the buttons are distributed left and right: Left button is the main button, right button is the AUX button)
1 Two-button operation
1.1 Main operation
1.1.1 Power On/Off
Verify that the batteries are in the lightsaber properly, and listen for the beep that signifies standby mode. When not in use, it's advised to take the batteries out of the lightsaber.
1.1.2 Activate/Deactivate Lightsaber
You may toggle the lightsaber on or off by pressing and releasing the primary button.
1.1.3 Mute Mode
Double-clicking the main button will start mute mode and turn the lightsaber on silently when it is off.
1.1.4 Motion Control
To turn on or off the lightsaber, turn the handle.
1.2 While blade is in standby mode
1.2.1 Adjust the Volume
To enter or exit the volume adjustment mode, long press and hold the main and auxiliary buttons simultaneously until you hear a "beep" sound. To boost the volume, briefly push the main button; to decrease it, briefly press the auxiliary button.
1.2.2 Switch Sound Effects
Single-click the auxiliary button.
1.3 While blade is active
1.3.1 Blaster Block
Single-click the AUX button.
1.3.2 FOC (Flash-on-Clash)
The lightsaber will automatically flash white and emit a sound when it comes into touch or collides.
1.3.3 Drag Floor Effect
Press and hold the primary button while tapping the blade's tip.
1.3.4 Background Music
Long press the main button to activate or deactivate the background music.
1.3.5 Change Color
Hold down the Auxiliary button while the lightsaber is on, then swiftly hit the Main button. To alter the lightsaber's color, slowly turn the hilt after hearing the prompt sound. After the prompt sound, simply press the main button to end the color change mode.
One button operation
2.1 Main operation
2.1.1 Initial Setup
Verify that the battery is inserted correctly and that the prompt sound is audible. Make sure the lightsaber is in standby mode. When not in use, it is advised to take the battery out of the lightsaber.
2.1.2 Motion Control
To open or shut the lightsaber, quickly move the handle with your right hand, then your left.
2.2 While blade is active
2.2.1 Close Blade
Long press the button.
2.2.2 Blaster Block
To activate the blaster, click the button; to lock-up, hold down the button and tap the lightsaber.
2.2.3 Stab
Thrust the lightsaber horizontally forward.
2.2.4 Melt
Press the button and advance the lightsaber.
2.2.5 Lightning Block
Press and hold the button twice, then let go.
2.2.6 Drag Floor Effect
Press and hold the button while tapping the blade's tip.
2.2.7 Force
Raise the blade to the surface, depress the button, and quickly rotate the handle to the left and right.
2.2.8 Change Color
Depress the button, crank the handle fast, and push the blade down. To alter the color of the blade, slowly rotate the handle after hearing the cue sound. To lock the color, quickly turn the handle after pressing and holding the button one more.
2.2.9 Battle Mode On/Off
Press the button three times, and then press it once more.
2.3 While blade is in standby mode
2.3.1 Turn On
Click the button.
2.3.2 Turn BGM On/Off
Double-click the button.
2.3.3 Silent Open Blade
Press and hold the button twice, then let go.
2.3.4 Switch Sound
Release the button after pressing it.
2.3.5 Volume Adjustment Mode
To activate the volume adjustment mode and hear the "drop" prompt, press the button and tap the lightsaber. To adjust the volume, click the button and hold it down for a lower volume. To end the volume adjustment mode and hear the "drop" prompt, press the button once more and tap the lightsaber.
2.3.6 Power Prompt
Triple-click the button
Note: For further information on how to use the lightsaber safely and in detail, please consult the user handbook that comes with it.
Proffie vs Neopixel: Which Lightsaber Tech is Right for You
When discussing lightsabers, it's important to take into account their many variations and configurations. Many fans of the real lightsaber are actually not very familiar with it, especially when it comes to the confusion between Neopixel and Proffie lightsabers. This article will go into detail about the connections and differences between Neopixel and Proffie lightsabers, making it easier to understand and more convenient to use. In order to help you pick between the Neopixel and Proffie sabers and give you a better understanding of both, this essay will go into great detail about their differences and connections.
What are Neopixel and proffie lightsabers?
Prior to deciphering the distinctions between the two, it is imperative that we ascertain the definitions of Neopixel and Proffie lightsaber. Once these are established, it becomes effortless to differentiate between the two.
The lightsaber community did not inspire the name Neopixel. Nonetheless, lightsaber aficionados now frequently refer to lightsabers as having LED strips inside their blades. There are other distinct applications of that technology, such as Golden Harvest, Proffie, Xenopixel, and others. Thus, one of those technologies is meant when the term Neopixel is mentioned about lightsabers.
To begin with, Neopixel truly refers to a particular kind of blade. This type of blade differs from the RGB saber's blade in that it is made of LEDs and is distributed between several LED lights. As a result, the ignition effect of the RGB saber is different, giving rise to a different effect.
The proffie saber sets itself apart from the RGB and SN V4 variants with its distinct saber configuration. It is not the same as the Neopixel lightsaber in certain ways, but since it uses Neopixel blades, it is still a Neopixel. All of the features of a Neopixel saber are essentially included in the proffie saber; however, not every Neopixel saber has the same functionality as a proffie saber. For that reason, the main focus of this essay is the differences between the Neopixel saber's proffie and ordinary versions.
NEOPIXEL OR BASELIT?
Although the traditional RGB (baselit) lightsaber is adequate for active fighting, wealthy collectors will find the new neopixel technology far more appealing. With a brighter light and a unique radiance akin to what we've all loved in the movies, using a neopixel lightsaber offers a far richer experience.
Neopixel not only makes a lightsaber brighter, but it also adds versatility to its design. Neopixel sabers are made with many LED strips inside the blade as opposed to only the hilt. This implies that you have many greater options for colors, special effects, and customized animations.
Difference between Proffie and Neopixel Lightsabers
![]()
The most crucial first step is to distinguish between a Neopixel and a Proffie lightsaber. To put it simply, a Neopixel is a unique blade, while a Proffie is a particular kind of lightsaber core. While all Proffie lightsaber blades are Neopixel blades, they aren't always Proffie sabers; they could also be SN v4 blades.
A number of embedded LEDs set the Neopixel apart from the RGB, making it a superior blade that enables more intricate and varied lighting effects. The Proffie, the saber's central component, has the ability to be altered beyond its current capabilities, allowing users to modify the blades' color and sound. It also has an excellent soundboard that produces a unique sound effect.
Proffie vs Neopixel: Differences in Sound Version
Proffie lightsaber can be customized. The Proffie is an open-source platform with customizable fonts, blade styles, and other effects.
While the standard Neopixel cannot be altered on its own and has pre-installed sounds, it might be a better option for people who are not familiar with programming.
Proffie vs Neopixel: Difference in Blades
The standard Neopixel lightsaber offers a wide range of color options for the blade effects; the Neopixel can be changed from one color to another, and the different colored blades create a variety of visual effects; forms of the saber, like Djem So or Juyo, can be rendered smoothly, which when paired with the different colored blades, creates an amazing visual experience.
The Proffie saber, on the other hand, offers a greater range of customizable blade styles. More aggressive tactics are better suited for blades like Flame and Unstable, and Proffie owners can entirely customize the appearance of their blades to match their distinctive combat form.
Proffie vs Neopixel: The Dueling Experience Difference
The Neopixel lightsaber is a fantastic tool for fighting; its complex designs and shifting colors will make you stand out in combat. The Neopixel flashes a bright light simultaneously as if it were coming from your fingertips during moves like Soresu or Ataru, which makes for an incredibly comfortable dueling experience.
Though the Neopixel saber has a striking appearance, the Proffie offers a more intense fighting experience. Dueling is made incredibly lifelike by advanced technologies, such as impact sensors that faithfully replicate the crackling sound of swords colliding. The blade's intricate touch effects improve the dueling experience even more. Similar to a genuine combat, the clash detection feature keeps swords from locking up and causing injury. Proffie lightsabers, which are designed to provide a greater degree of immersion, are unmatched fighting tools for fighters aiming to learn more aggressive forms like Juyo or Vaapa.
WHAT CAN YOU DO WITH A NEOPIXEL LIGHTSABER?
First off, if necessary, you can engage in some light to medium level dueling. Although some damage is possible due to the flexible LED structure inside the blade, we advise against recreating the entire Darth Maul combat scenario.
Neopixel lightsabers provide cosplayers and collectors with a dream come true outside of combat. Your creativity is the sole restriction on the various configurations of blaster bolt deflection, unstable blade effects, animations, and blade scrolling effects.
Neopixel allows you to create a fully customizable lightsaber that imitates your preferred George Lucas character or, for a more customized experience, you can create an avatar outside of canon.
These constructions have the benefit of having separate LEDs that may be individually controlled for various effects. With this, you have far greater adaptability than with regular RGB baselit lightsabers. Everything else about the build is much the same. All of the electronics, batteries, and soundboards needed to improve your lightsaber experience are still housed in the hilt.
Neopixel technology is more power-hungry than RGB lightsabers, so bear that in mind. Despite using LED technology, they will consume up a battery more quickly. Consider bringing extra batteries if you intend to use your Neopixel lightsaber during a cosplay event or party.
Conclusion
In summary, the proffie lightsaber is a kind of Neopixel saber, but it's critical for buyers to recognize the distinctions between the two. Programming settings and customisation are supported by the proffie saber, which is crucial for individuals who enjoy creating their own lightsaber effects.
FAQs
1.What is a Proffie lightsaber?
A particular kind of modified saber known as a Proffie lightsaber makes use of the Proffieboard, an open-source sound and motion controller board made especially for fans. It has sophisticated blade profiles, sound effects, and customizing possibilities.
2.What are Neopixel lightsabers?
Neopixel blade technology is a feature of neopixel sabers. Neopixel blades have an inside string of individually addressable LEDs that enable more realistic ignition and retraction effects as well as scrolling patterns, making them more colorful and adaptable.
3.Can Proffie lightsabers utilize Neopixel blades?
It is possible for Proffie lightsabers to work with Neopixel blades. With the use of Neopixel technology, the Proffieboard offers a multitude of customizable blade effects, including color, intensity, flicker, and more.
4.Can I change the sound fonts on a Proffie lightsaber?
Yes, changing the sound typeface on a Proffie saber is one of its benefits. Sound fonts are sets of recorded sounds with various sword sound effects. By using the Proffieboard, you may customize the sound effects of your lightsaber and create a one-of-a-kind experience by switching between different sound typefaces.
5.How do Neopixel blades differ from traditional lightsaber blades?
Neopixel blades are not like regular lightsaber blades in that they have an inside strip of individual LEDs. More sophisticated and adjustable lighting effects are now possible, such as the ability to display various colors along the blade, create dynamic patterns, and create smooth color transitions.
6.Can Neopixel blades be removed from the hilt?
Neopixel blades can usually be taken out of a lightsaber's hilt by unscrewing or detaching them; this depends on the design and method of attachment. This makes it possible to store and move the saber more easily.
7.Are Proffie and Neopixel lightsabers suitable for dueling?
Dueling with Proffie and Neopixel lightsabers depends on how well-made and durable they are. Certain models are made with stronger materials to resist the impact of battle and are specifically intended for dueling. Before partaking in a strenuous dueling, it is crucial to review the manufacturer's specifications and recommendations.
8. Can I control Neopixel colors using Profffie?
A: Yes, Profffie allows dynamic color customization.
9.How is the Neopixel blade different from a traditional lightsaber blade?
Neopixel lightsabers are not like conventional lightsabers in that they employ an internal LED strip that is independent from the lightsaber itself. This makes it possible to create more intricate and adaptable lighting effects, such as dynamic patterns, seamless color changes, and the capacity to change the lightsaber's color.
Can Proffie boards control Neopixel lightsabers?
Neopixel lightsabers can be controlled by profi boards to produce better sound and lighting effects.
Are there any specific tools required for Proffie board customization?
Basic programming knowledge is necessary for customizing Proffie boards, and uploading your configurations to the device is done through an app like the Arduino IDE.
Do Neopixel lightsabers require special care or maintenance due to their advanced technology?
Neopixel lightsabers need to be handled cautiously to prevent damage to the internal LED strips and to prevent forceful hits.
Is there a community or forum where I can learn more about customizing Proffie lightsabers?
Indeed, there are a number of internet communities and forums devoted to customizing lightsabers, including thorough talks about programming the Proffie board.
Can Neopixel lightsabers be used in lightsaber duels, or are they too fragile?
Neopixel lightsabers are suitable for light-to-moderate battling and are often robust. Nevertheless, caution is advised because LED strips may be more fragile than conventional lightsaber technology.
STARKILLER LIGHTSABER - All You Need to Know
Join the Dark Side of the Force!
One of the best and most awesome fictional Star Wars characters was Galen Marek, also known as Starkiller. He debuted in the video game Star Wars “Force Unleashed II. Following the rise of the Empire, Galen Marek, an adolescent Force-sensitive who was being tracked down by Darth Vader while pursuing Jedi one by one, took on the moniker Starkiller after years of training under Vader.
Initially a Sith, Starkiller used a red lightsaber to fight multiple Jedi. Later, after converting to the Light Side of the Force, Starkiller fought the Empire using blue lightsabers. His first lightsaber was based on Darth Vader’s, although it was lighter and had just a shell and an emitter. Darth Vader gave him the red crystals for his saber. Darth Vader ultimately lost this saber as a result of his betrayal.
The second saber Starkiller had belonged to Rahm Kota. But he never felt that this was his lightsaber, so he replaced the green crystal with a blue one. Unfortunately, he had been defeated, and his blade was by his side as he died. Vader finds him and uses his foot to stomp on the lightsaber.
STARKILLER: A FICTIONAL CHARACTER
A critical character in the Star Wars universe is Starkiller. Many strong Force users in the Star Wars world might be unable to match Starkiller's abilities. Recognizing Galen’s undisguised Force connection aptitude, Vader adopted the child and groomed him covertly as a Starkiller. Even as a young child, he could tear Darth Vader’s lightsaber from his grasp, but that was just the start. Vader’s attempts to hide Starkiller’s presence and the Rule of Two prevented him from being identified as a Sith. As Vader’s pupil, he used his lightning-fast lightsaber talents to kill multiple Jedi.
Vader built and programmed PROXY, a Starkiller droid companion, to help train the young man by constantly trying to kill him. Starkiller was influenced by Rahm Kota, a Jedi whom he had been ordered to kill in a prior mission. Later, Rahm Kota joined the rebels and became the martyr who motivated the rebels to overthrow Palpatine. Though trained as Darth Vader’s Apprentice and possessing many Dark Side-only abilities, he died as a Jedi and united with the Force.
LIGHTSABER PROFILE OF STARKILLER LIGHTSABERS
Subject 1138 “Starkiller” was a clone of Darth Vader's clandestine apprentice equipped with two lightsabers. While training on the planet Kamino, the Dark Lord gave the clone the lightsabers. They were used during his escape attempt right after Darth Vader deemed Starkiller another annoyance in a lengthy string of defective clones.
Quick specifications of Starkiller Lightsaber
Prototype: Sith Lightsaber
Type of blade: Single-bladed
Popular Culture: Sith orderJedi order
Construction date: 1 BBY
Destruction date: 1 BBY
Hilt shape: Cylindrical
Crystal type: Artificial crystals for lightsabers, Jedi lightsaber crystals
Blade Color: Red Blue
Owner: Starkiller
Usage: Lightsaber battle
Affiliation: Restoration of the Republic by the Sith Order, Galactic Empire Alliance
STARKILLER FIRST LIGHTSABER
His first lightsaber was based on Darth Vader’s, although it was lighter and had just a shell and an emitter. The outside of the hilt was covered with a seemingly destroyed metal sheath in place of a handgrip. Darth Vader gave him the red crystals for his lightsaber, which he displayed on his hilt. He became famous for creating a crimson lightsaber out of synthetic crystal.
The Starkiller uses a high-standard hilt like his mentor, Darth Vader. Using a crimson lightsaber, Starkiller was strong enough to defeat Shaak Ti, a master Jedi.
STARKILLER SECOND LIGHTSABER
(BLUE-BLADED JEDI LIGHTSABER)
The second lightsaber he owned had belonged to a Jedi named Rahm Kota. But he never felt that this was his lightsaber, so he replaced the green crystal with a blue one. This blue crystal was his father’s. He had found it among the ruins of their hut on Kashyyyk. He eventually used his lightsaber to destroy Vader as it became more receptive to him. And he wielded this sword against Sidious.
CONSTRUCTION OF STARKILLER’S LIGHTSABERS
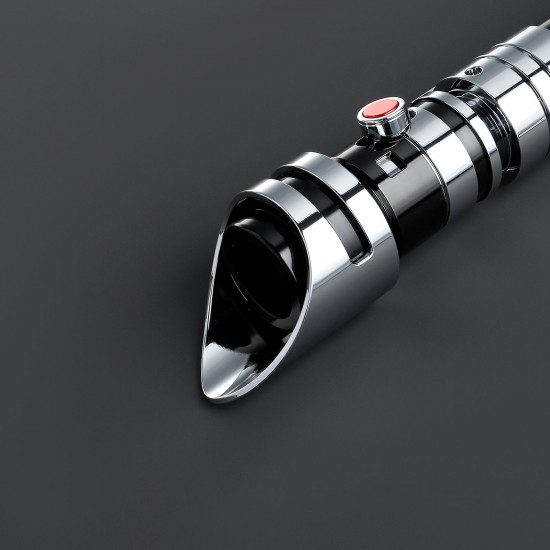
The transparent hilt of both Starkiller’s lightsabers displayed the blade’s internal energy fluctuations. The activator was a simple red button located halfway down the length of the silver ring that encircled the hilt. The hilts were made up of a sequence of black plates. These emitters featured tilted, wrap-around protection that resembled emitter shrouds in appearance, in contrast to the standard emitters of the original stock design.
SPECIFICATIONS
Starkiller dual weapons were used to train Galen Marek’s clone in lightsaber combat. They were part of Vader’s second set of sabers awarded to clones that performed very well throughout their trials. Consequently, these lightsabers had a synthetic crystal that produced a red blade. These new clones used a modified version of the original lightsabers, used by the clones deemed unsuccessful early in their training.
STARKILLER UNDERGOING SITH TRAINING
Darth Vader didn’t teach Starkiller anything. All he did was teach him the basics of fighting. Through torturous training techniques and memory suppression, Vader focused on creating hatred and rage in Starkiller. Vader needed to do this so that Starkiller could adopt the Sith persona and utilize the evil side of the Force.
After that, he encouraged his followers to create their fighting tactics. Starkiller possessed a lightsaber-training holodroid named PROXY. PROXY was skilled at mimicking Jedi fighting methods and regularly attacked his master to keep him guessing. Although PROXY could imitate Obi-Wan’s and even Darth Maul’s fighting styles, Starkiller was able to destroy PROXY. He was able to overcome Vader and fend off Sidious in one scenario.
JOURNEY TO BECOME A JEDI
The Dark Lord’s first apprentice, Galen Marek, was replaced by several manufactured and tested clones. Starkiller’s first task with his new weapons was to destroy a group of training droids dressed as Rebel soldiers. The clone showed no mercy to the Rebel Alliance, having been trained to slaughter the mocktroopers easily. He found himself ineffectual, unable to wield his lightsabers to combat a holodroid that had taken on the image of Captain Juno Eclipse.
Taking his sabers with him, Starkiller escaped Kamino after turning against his creator. The failed training session caused this, and the reappearance of memories of the Human woman Marek fell in love with.
Starkiller had previously been ordered to kill a Jedi named Rahm Kota, but he later joined the rebels and became the martyr who motivated the rebels to overthrow Palpatine. Rahm Kota later influenced Starkiller. He adjusted the color of the blades to blue, and Kota gave him two crystals to replace Starkiller’s artificial ones.
LIGHTSABER FIGHTING SKILLS
Like his clone ancestors, Starkiller was programmed with the knowledge and skills of his genetic template through memory flashes. As a result, he inherited his penchant for the Shien-style inverted grip along with Form IV and Form VI combat skills from the original Starkiller. These battle forms helped the clone ultimately grasp the Jar’Kai approach, which Starkiller found to have advantages and disadvantages.
He acknowledged that the use of two lightsabers enhanced his overall fighting abilities. However, it diminished the Force of Jar’Kai’s attacks by preventing him from wielding a lightsaber with both hands.
USAGE OF STARKILLER LIGHTSABER
1. On Cato Neimoidia
The Starkiller in Tarko-se had slain many stormtroopers and other Imperial fighters before using his lightsabers on Baron Merillion Tarko’s Gorog on Cato Neimoidia.
2. Against Terror Troopers and Droids
Soon after the lightsabers were altered, Starkiller used them to defeat a troop of Terror Droids and Terror Troopers who had infiltrated the Alliance Fleet’s flagship, the Salvation, under Captain Eclipse.
3. Duel With Imperial Soldiers
After clearing the spacecraft of the Terror squadrons, the clone wielded his lightsabers against several Imperial troopers, including Sith Acolytes and Saber Guardsmen, during the Kamino Assault.
4. Against Clones
Fighting a group of mutant clones descended from Galen Marek forced Starkiller to use his lightsabers.
Starkiller and Darth Vader engaged in a lightsaber duel. As Darth Vader threatened to use the Force to strangle Juno Eclipse to death, Starkiller threw away his weapons in a gesture of surrender. Eclipse unintentionally damaged Vader’s armor’s control panel while attempting to kill the Sith Lord with one of the lightsabers that Eclipse had surreptitiously stolen. In the final battle, Vader disabled Starkiller with a Force blast, completely shattering the two lightsabers.
Having lost all his weapons, Starkiller used Force Lightning to immobilize the owner of Vader’s lightsaber before stealing it. When Kota’s troops captured Starkiller, Darth Vader’s lightsaber was still in his grasp.
Appearances:
In the video game Star Wars “Force Unleashed II,” Starkiller made his debut.
WHICH LIGHTSABER FORM DOES STARKILLER USE?
Starkiller needed a thorough understanding of the seven lightsaber dueling forms. Instead, his fighting style was completely different. Due to his lack of training, he developed a hazardous and aggressive lightsaber combat style. His use of a lightsaber could have been more predictable and haphazard. Starkiller was trained to battle with two lightsabers. Starkiller refined his skills and perfected Jar’Kai using the dual-blade training regimens of the Form IV/Ataru and Form VI/Niman lightsabers. These forms especially appealed to him.
To confront his enemies, Starkiller has mastered various lightsaber combat methods.
Form III/Soresu: The battle technique of Dun Möch was refined by Starkiller. This tactic distracts an enemy by using psychological espionage and taunting. He could also protect himself using Soresu, which he had learned independently.
Form VII/Juyo: Juyo was also hired by Starkiller. The Sith gang prefers Juyo Form since it ensures their combat skill and makes them such strong fighters. The most vicious and lethal lightsaber fighting method necessitates the Dark Side.
Form V/Shien: Starkiller was skilled at using various combat techniques in the Shien fighting form. He also appreciated the inverted grip Shien adopted. He used the “Sith Shien” Form V variant in combat. This is a brief sequence of attacks intended to destroy an enemy as soon as feasible. Shein concentrates on trading blaster strikes.
FIND THE STARKILLER LIGHTSABER REPLICA IN THE REAL WORLD
Who would pass up the chance to purchase a lightsaber of this caliber? For those who want to embrace the dark side of the Force, nothing is more thrilling than wielding a Starkiller lightsaber. You can become a formidable fighter and unleash your dark side of the Force with the help of this fantastic lightsaber.
Buy from LaserPointerWorld
Thankfully, a Jade II saber device resembles a Starkiller crimson lightsaber and can be purchased. You will sense the same Dark Force energy emanating from it due to its incredibly realistic appearance. Adding the Jade II saber to your collection could improve your adventure. The Jade II saber is an excellent replica with many intriguing and distinctive features.
This lightsaber is more reasonably priced than others and has every function you need. It’s perfect for novices or those on a tight budget who want to add more lightsabers to their collection. Get the Jade II saber from LaserPointerWorld and feel the dark side’s power. The aluminum alloy used to make the hilt of this lightsaber is designed for fierce fighting. The smooth swing function makes the battling experience more realistic. A long battery life will give you plenty of time to defeat your adversaries in combat.
JADE II SABER
LaserPointerWorld ensures that Star Wars fans get what they want. So here it is—the Starkiller lightsaber, with all the unique features that Starkiller’s original weapon lacked.
Features:
It is ideal for heavy dueling because of its long, detachable, shatterproof polycarbonate blade with a defusing finish. Additionally, it features a flash on collision and motion sensors that produce sound effects when swinging. With nine distinct sound themes, a range of sound effects, and a replaceable lithium-ion battery, you might have a day of lightsaber combat.
Let’s discuss the cutting-edge equipment housed within its hilt. A 50-watt long-lasting battery with a quick charger is available. This lightsaber incorporates acoustic technologies in addition to batteries. The RGB Baselit, Proffie, and Xenopixel soundboard technologies are available for this lightsaber’s soundboard.
It was built out of aluminum, a lightweight, durable material. Thanks to the hilt’s well-fitting design and exceptional gloss, the lightsaber can swing smoothly during combat. With its 92 cm length, 2 mm thickness, and robust polycarbonate construction, the Jade II Saber’s blade can withstand powerful lightsaber strikes. The 12-watt LED strips inside the blades, which produce 12 preset colors, are protected by this material. There are numerous blade sizes to choose from.
Savor breathtaking effects that will make your combat more intense. A must-have addition to any lightsaber collection is the lightsaber of the formidable warrior Starkiller!
FAQs
1. What is Starkiller’s codename in Star Wars?
After years of training under Darth Vader, Galen Marek, a youthful Force-sensitive who the villain was tracking down as he was hunting down Jedi one by one following the rise of the Empire, took up the moniker Starkiller.
2. What are Starkiller’s lightsabers made of?
The transparent hilt of both Starkiller’s lightsabers displayed the blade’s internal energy fluctuations. The activator was a simple red button located halfway down the length of the silver ring that encircled the hilt. The hilts were made up of a sequence of black plates. These emitters featured tilted, wrap-around protection that resembled emitter shrouds in appearance, in contrast to the standard emitters of the original stock design.
3. What happened to Starkiller’s lightsabers before he fought Vader?
Starkiller and Darth Vader engaged in a lightsaber duel. As Darth Vader threatened to use the Force to strangle Juno Eclipse to death, Starkiller threw away his weapons in a gesture of surrender. Eclipse unintentionally damaged Vader’s armor’s control panel while attempting to kill the Sith Lord with one of the lightsabers that Eclipse had surreptitiously stolen. In the final battle, Vader disabled Starkiller with a Force blast, completely shattering the two lightsabers.
4. Is Starkiller the most potent force user?
The abilities of Starkiller Although there are several influential Force practitioners in the Star Wars universe, Starkiller’s abilities might be superior to all of them. Even though he was still a young boy, he could instantly tear Vader’s lightsaber from his grasp, but that was only the beginning. It might be more significant than many of the Star Wars universe’s influential Force users.
5. What was Galen Marek’s (Starkiller) lightsaber fighting style?
His use of a lightsaber could have been more predictable and haphazard. Starkiller was trained to battle with two lightsabers. Starkiller refined his skills and perfected Jar’Kai using the dual-blade training regimens of the Form IV/Ataru and Form VI/Niman lightsabers. These forms especially appealed to him.
Starkiller was skilled in the Shien fighting form but used various combat techniques. She also appreciated the inverted grip Shien adopted. He used the “Sith Shien” Form V variant in his fights. Starkiller also hired Juyo. The most vicious and lethal lightsaber fighting method necessitates the Dark Side.
6. Who is Starkiller in Star Wars?
A critical character in the Star Wars universe is Starkiller. When Darth Vader saw Galen’s undisguised Force connection skill, he adopted the child and secretly groomed him as a Starkiller. He could tear Darth Vader’s lightsaber from his grasp even as a little lad, but that was just the beginning. Vader’s attempts to hide Starkiller’s presence and the Rule of Two prevented him from being identified as a Sith. As Vader’s pupil, he used his lightning-fast lightsaber talents to kill multiple Jedi.


